Don’t you just hate it when you are working on a woodworking project, and somewhere along the way you discover that something just isn’t right? You’ve read the instructions and you’ve followed the plans, but for some reason your pieces don’t fit correctly, or your outcome just looks wonky. It makes you just want to pull your hair out and scream. ;-) Well, before you sacrifice your hair, first take a look at the reasons why woodworking projects fail. I bet you will discover that your problem is one of these 7 issues.
(This post may contain affiliate links (*). That means that I make a small commission from sales that result through these links, at no additional cost to you. You can read my full disclosure here.)
7 Reasons Why Woodworking Projects Fail –
#1 Inaccurate Measurements
If you have never heard the old saying measure twice and cut once, I can’t stress enough how important that this rule is. In fact, I suggest measuring an additional 3rd time, just to be sure. Believe it or not, the biggest mistake that occurs in woodworking projects is inaccurate measurements.
Some of the other measurement mistakes that I have seen in the past (besides failing to recheck for accuracy) are failing to mark the measurement. Don’t try to wing it. Lay the measuring tape out and clearly mark the spot or line.

If your tape measurer has lost its hook or the play had become overly worn, it is time to buy a new one. There are a lot of options out there. I personally have 7 or 8 tape measures, but my favorite is my Stanley Fat Max.*
7 Reasons Why Woodworking Projects Fail –
#2 Inaccurate Cuts
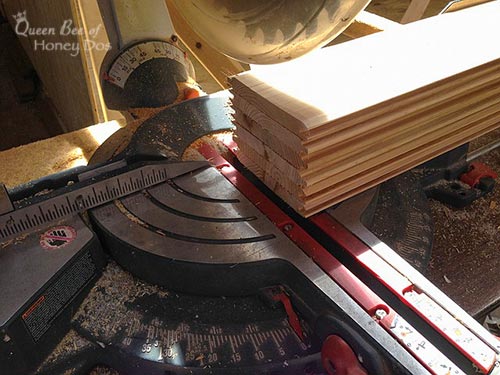
Not getting exact cuts can throw off a project by anywhere from a minuscule amount to enough to cause that wonky look I mentioned before. Generally, a woodworking project will call for multiple pieces to have the exact same measurements – such as 4 legs needing to be the same length, or the tops and bottoms of a cabinet needing to be identical. If they are not cut to the exact lengths, the outcome could be a wobbly table or a crooked shelf. One solution is to cut all the pieces as a unit (shown above). However, this is not possible for most projects.

A better solution is to use a stop – like this one that I have from Rockler* for my miter saw table. If you don’t want to purchase a stop, you can alway make one. Really, all you need is something that is square and level that can be locked in place to guide you with your cut. The way that this one works is that you slide it to the correct length along the track, then flip it down and lock it in place. Then, I can just line my wood up against the stop for each cut. This gives me precise cuts every time.
7 Reasons Why Woodworking Projects Fail –
#3 Misaligned Blades

Regardless of what type of saw that you use to cut your wood, if the blades are not aligned properly the results will not be accurate. What you will end up with is a cut that is slightly angled. You may not even be able to see it with your eyes, but when it comes time to assemble your pieces, it can cause them to not have a nice fit at best, or worse, it will completely throw the whole thing out of whack.
To check your table saw, raise the blade as high as it will go. Then, use a combination square to test the alignment (shown above). The blade should be at a perfect 90 degrees from the table. If not, make adjustment until it is accurate. The only reason for an angle is when you intentionally set the blade to cut on an angle. I suggest checking your blade alignment periodically.

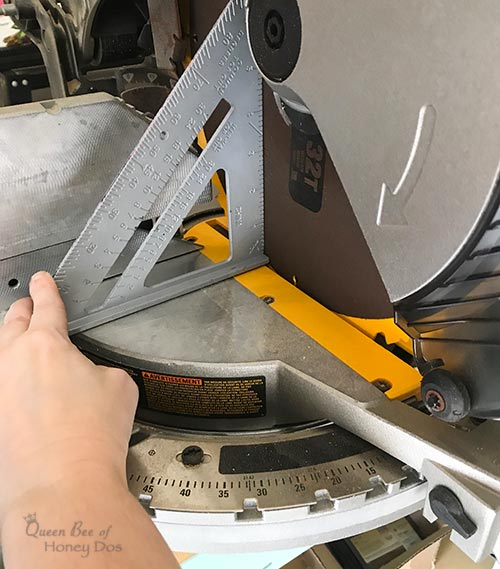
To check the alignment, unplug the miter saw. Then, lower the blade as you would to make a cut. Place the square on the miter table and slide it up against the blade. The blade should be flush against the square for the entire length of the square. If there are any gaps at all, adjust the blade angle until it is square. Note – sometimes true square will not be indicated by a zero setting – although technically, it should.
7 Reasons Why Woodworking Projects Fail –
#4 Inaccurate Guides/Fences

Guides are a great way to get accurate cuts with a circular saw. In fact, they work so much better than trying to eyeball the cut or relying on a laser. You can make you own guide, if you are of the mind to do so. I use these Kreg Circular Saw Guides* when I am using my Skil saw. It comes in both a 24″ guide* and 48″ guide* (shown above).
7 Reasons Why Woodworking Projects Fail –
#5 Failing to Check for Level

7 Reasons Why Woodworking Projects Fail –
#6 Failing to Check for Square

If the square does not lay flush on both sides, even if there is just a small amount of space, then you are not square. In which case, you need to make an adjustment before attaching the pieces. If you have checked off numbers 1-5, you should be able to get it square with very little effort. If, on the other hand, you are ending up with pieces that can’t be made square, and you are certain that you have done all the above steps correctly, then the problem is probably with your wood choice.
7 Reasons Why Woodworking Projects Fail –
#7 Defective/Low Quality Wood

First of all, you need to make sure that you are getting straight boards free from defects (unless you are going for rustic – in which case a few defects may be desirable). You can typically tell if a piece of wood is straight by looking down the length. Place one end of the wood on the floor, and tilt the other end up towards your eye. Check to see if it is nice and straight on the face and the edge. (i.e Not bowed, bent, cupped, or twisted). You can see some good examples of defective wood in Wood Magazine.
Secondly, there are better grades of wood that you can use besides the lumber that can be purchased through your big box stores. Actually, the big box stores do carry a limited supply of furniture grade lumber, but you still need to check it for defects. (The furniture grade lumber is usually located in or next to the aisle with the trim).
You can also have wood milled for you if you have a lumber yard close by. If not, you can always order special pieces. I like to buy some of my wood from Rockler.* Regardless of where you buy your lumber or what grade you choose, you can always work it out to get a nice outcome. Just take a look at my table top that I made from raw cedar boards.
Final Comments…
Although I didn’t mention it, I think that it goes without saying that getting into too big of a rush can be the worst mistake of all. I am so guilty of that. As a result, I do tend to look like the woman in my feature image from time to time. :-)

-PIN IT-

-PIN IT-


John Sims says
Thanks a lot for another great information. This website has been my gateway to information :)