(Disclosure: Affiliate links to products I trust and use appear in this article.If you would like to read more about this please see my Disclaimer page).
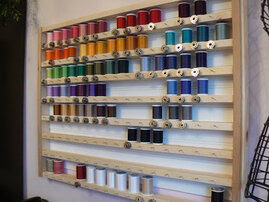
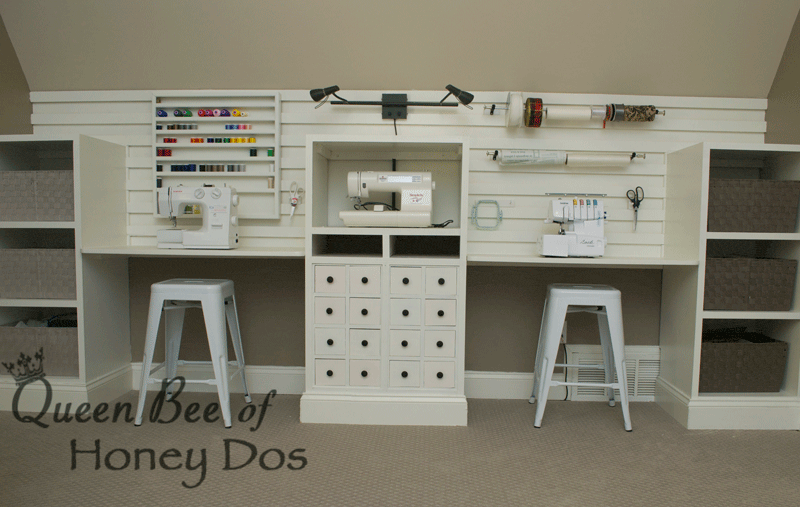
So, I needed a thread shelf to hang on my new wall storage system, and I have seen a few similar to this one floating around on the web.

Like this one found at Sugar Bee Crafts,

or this one found at The Creative Homemaker. I like how she added the bobbin nails. I may do that later.
However, none were exactly what I wanted. So,off to the hardware store to pick up some supplies and get started on one customized to my requirements. (Note: as of this photo I still haven’t moved all of my thread supply to the case. But I will get around to it eventually).
While picking up supplies, I decided that I would purchase items to make this a fast and easy project for DIYers with limited woodworking experience. So, I am using just basic 2 x 1/2″ select pine that are 24″ long. They are precut and ready to go at either Home Depot or Lowes. You can also have them cut the back for you. This means that there will be no sawing for this project, unless you choose to add the trim. All you will need is:
Sewing Thread Organizer Materials
- (10 – 11) 2 x 1/2″ pine boards at 24″ long. (I am using 11, but the number will be determined by how far apart the shelves are placed).
- 3/4″ trim (optional)
- 24″ x 25″ (shelf back) cut from 1/8″ plywood.
- Pocket Hole Jig and 1″ screws (I used the R3 Kreg Pocket Hole Jig for this project, you can read more about them here).
- Clamp
- Level
- Measuring tape (for trim)
- square
- Finishing nail gun (small finishing nails can be used if you don’t have the nail gun).
- Miter box and Hand saw (for trim)
- wood putty and paint
Tip: Make sure the shelf boards are 1/2″. As you can see from my image, I bought a few that were 3/8″ by mistake. I just grabbed a handful without looking. So, be aware that the store gets these mixed up sometimes. Check closely, because the 3/8″ will be too narrow for a 1″ pocket screw. You will just end up having to make another trip like I did.
Sewing Thread Organizer instructions
To make the pocket holes, clamp the jig and board to a table to stabilize it. (FYI I have added these images to the article for the Kreg Pocket Hole Jigs). Make sure the jig is centered perfectly over the board. This R3 jig is perfect for these boards, but a slightly uncentered placement will result in the hole coming through the edge of the wood.
Now drill the holes. (Tip – make sure that you have your jig setting correct for this depth of wood. If you are new to using pocket hole jigs, check out the instructions before proceeding. You can find an in-depth article here).
This is how the holes should look after you have finished drilling. As you can see, the drill bit just misses the edge on these boards. This is why I stress to get the jig centered.
Now flip the board around and drill the pocket holes in the other end. Repeat this process for all of the horizontal boards. (Do not drill holes in the two vertical sections).

Make sure that the sections are being attached to produce a straight and squared frame. Then, attach all four corners of the frame.
Next, I marked the placement for where the shelf boards would sit. I am going to use the lowest shelf for my craft glues. They will require 4 1/2 inches of space, so I am marking 5″ from the bottom of the shelf (4 1/2 + the 1/2″ thickness of the boards). This line will mark the location of the bottom of the next shelf.
I am now marking the spaces required for my different thread sizes. You can see that I have also tentatively placed the shelves in the frame so that I can see how the spacing will look as I go. I am giving myself 2 1/2″ for my taller threads. I will mark this line 3″ from the first line. (2 1/2″ + 1/2″) Continue measuring and marking the lines in this manner for the depth that is required.

If everything looks right, attach all of the shelves using the same steps as above. Check as you go for level.

Now, you can flip the shelf over and nail the backing in place. Make sure it is aligned properly and use either the nail gun or the small finishing nails and a hammer.

This is how my case looked at this stage. If you do not plan to add trim, you can go on to priming and painting. However, I chose to add trim to my case for two reasons. 1) I am using the edge of the trim as a stop ridge for the thread. It will keep them from falling out if the case gets bumped. 2) It just looks pretty. :-)
To begin, measure and miter the outer frame trim. Then use the finishing nail gun to tack it in place.
For the trim on the shelves, you will need to measure each board. Hopefully, they are all the same. More likely than not, you will have a slight variation in the lengths of a few boards. On mine, the one that I am measuring here turned out to be 1/8″ shorter than the rest.
Measure and cut accordingly. Then, nail these in place.
One thing that I wanted to point out: Be aware that if you buy a decorative trim, it may require some additional work to get a nice look. On my trim, the edged had a router effect which caused the ends to look like they protruded above the vertical trim piece. So, I used my dremel to sand it down at a 45° angle. (It looks a little crooked from this photo angle, but I promise it is straight). This is not something that is required; however, just keep this in mind when choosing your trim.
On the horizontal trim, make sure that the trim is flush with the bottom edge of the shelf board. This will allow 1/4″ to protrude above the top edge of each shelf. This creates a lip that will keep the threads from falling out.

Once all of the trim is in place, fill all of the nail holes with wood putty. Allow it to dry, and then lightly sand it smooth. (Don’t worry, I will remove those barcode stickers before I paint) ;-)
If you are making this case to hang on the wall storage system that I showed everyone how to build, you will now need to attach a cleat. Dig through those left over scrap cleats that I told you to hold onto. Find one that is the same length as the shelf (25″). You can use a shorter piece as long as you make sure that it is attached through one of the horizontal boards. I just grabbed this one. It is close enough, but what’s up with the dirty end?!?!
Align the cleat with the top edge (or along a shelf as I am doing) and nail in place. You can see that I am using my square to make sure that the cleat is staying aligned. This keeps me from missing the shelf board with my nail gun.
This is why it is important to get the cleat aligned correctly. You don’t want this to happen. ;-)
Primer and paint. I just used some left over gray primer that I had around. The paint is the same as was used on the wall storage system.
Finally, done! You will notice that I decided to put my fat threads on their side on a shelf originally intended for short thread. I discovered that I just like this display better. So, the shelf intended for these is pretty bare.

And here it is hanging on the wall storage system that I made.
This post is linked up with Just a Girl and Her Blog, Blesser House, and Savvy Southern Style


kat says
Really well done. Thanks for sharing!
Rachel says
No, thank YOU for sharing! :-)
Terri says
Nice, big, cabinet. BUT…thought I would share something from my personal experience. I had a LOT of thread and started having a lot of trouble with thread breaking. As I talked to the professionals, I learned that you should only have what you can use in a year. Turns out it breaks down and weakens with time and will give you lots of headaches. Now, I also do a lot of machine embroidery, so you may get away with more if you are just doing regular sewing. They also said, like fabric, not to expose it to sunlight. Keeping it behind a closed door is best. I know, it goes against a lot of what we see for craft and sewing rooms, but hey, why would they stop us from doing something to ruin our thread so we would have to buy more? It keeps them in business. Hope this helps keep you from headaches in the future. Just found your site and love it! Looking forward to that tutorial on the lighted movie poster box. ;-)
Rachel says
Terri, Thanks for sharing this with everyone. That’s something to think about. Some of my thread is at least 10 years old. lol But I never have trouble with it. Seems like it should be made to last longer than a year, otherwise it would break apart in the clothing constantly, especially with repeated washings. Maybe they are trying to make more money by getting us to throw away old thread to buy new. ;-). But it’s definitely something to think about. Thanks for bringing some thoughtful material to the conversation! :-)