If you take a look around the internet, you will see that there are a lot (and I mean A LOT) of people showcasing their DIY refinished cabinets. Seems like everyone has gotten on board with this do it yourself project. I’ve done several refinish jobs myself over the years. In fact, I am in the process of redoing my laundry room right now. (Coming soon).
Because of that, I wanted to discuss just a bit the process for getting a quality job. Plus, I wanted to show some well done before and afters of several refinished cabinets that followed all of the correct steps.

(Traditional Bathroom by Charlotte Artists & Artisans Creative Brushworks)
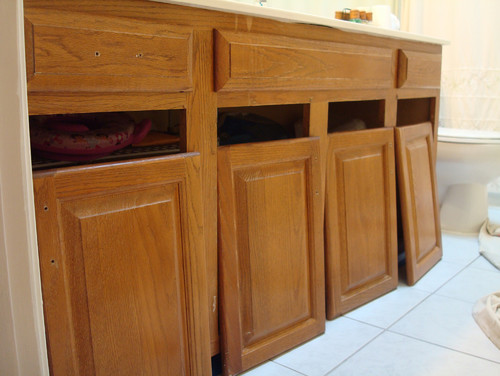
Before: Because oak cabinets are some of the most difficult cabinets to refinish (and usually the most often requested for an update), I have focused mostly on this type. As you can see from the above image, oak has a very open grain pattern that will not easily give that smooth as glass finish.

(Traditional Bathroom by Charlotte Artists & Artisans Creative Brushworks)
After: This after image demonstrates how well they can turn out, though, when the right steps are taken. These refinished cabinets (as well as all the refinishes presented here) have adhered strictly to the process of prep work. 1) Deep clean. 2)De-gloss/sand. 3) Prime with the proper primer 4) Sand between coats, and 5) apply sealer

(Spaces by Charlotte Artists & Artisans Creative Brushworks)
This is an up close image of the door. To hide all of the grain patterns in oak cabinets, a good filler must be used as well as a bonding primer. These cabinets were painted with Sherwin Williams “French Roast” and a black glaze was added for accenting.

(Traditional Before Photos by Fredericksburg Kitchen & Bath Remodelers Pro Refinish)
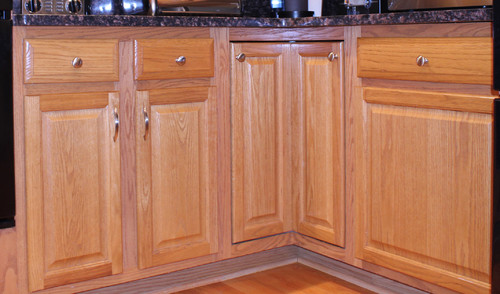
Before: Honey stained oak cabinets surround this kitchen.

(Spaces by Fredericksburg Kitchen & Bath Remodelers Pro Refinish)
After: These cabinets received a lot of attention to the prep work in order to fill the grain and get this final finish. The cabinets were finished in white and distressed around the raised line areas, and new hardware was added.

(Traditional Kitchen by Fredericksburg Kitchen & Bath Remodelers Pro Refinish)
Before: These oak kitchen cabinets make this kitchen look dark, dated and confining.

(Traditional Kitchen by Fredericksburg Kitchen & Bath Remodelers Pro Refinish)
After: An off white paint for cabinets, new tiled backsplash, and a black distressed island create an open, fresher feel.

(Traditional Kitchen by Fredericksburg Kitchen & Bath Remodelers Pro Refinish)
After: This is an up close image of the detailing applied to the island. The island is finished in a black with distressing along the raised areas.

(Before Photos by Fredericksburg Kitchen & Bath Remodelers Pro Refinish)
Before: Honey oak cabinets look a little dated in this bathroom.

(Kitchen by Fredericksburg Kitchen & Bath Remodelers Pro Refinish)
After: Off white paint that has been distressed offer an updated look. Notice that the toe kick has been framed out and covered in molding. The end panel has also been recovered in bead board. These additions create a more furniture like appearance for the vanity. Now, the hardware actually looks like it belongs here.

(Before Photos by Lake Bluff Paint & Wall Coverings Ragsdale, Inc.)
Before: Standard oak built ins. This reminds me of my first kitchen. I had oak cabinets just like these in a fixer upper that my husband I had purchased for our first home. I spent several weeks redoing them to change my kitchen from an 80’s frumpy country to a late 90’s modern. That was the first of several oak refinishing jobs that I have done.

(Kitchen by Lake Bluff Paint & Wall Coverings Ragsdale, Inc.)
After: And the after reminds me of the kitchen cabinets that I have now. (which can be seen in the DIY project for my dish drawer organizer or my knife/cutting board drawer). This finish can be achieved by using an off white for the base color with a chocolate glaze. (my cabinets have a Vanilla Bean glaze)

(Kitchen by Lake Bluff Paint & Wall Coverings Ragsdale, Inc.)
This is an up close view of the cabinets from above. Notice how the glaze catches in the oak grain. On a different type of wood, such as the maple that I have in my kitchen, the glazing is more uniform and cleaner looking. I like the way that they added the splatter effect to the cabinets to help draw the attention away from the grain pattern.

(Before Photos by Lake Bluff Paint & Wall Coverings Ragsdale, Inc.)
Before: Just to include something other than oak, these honey maple cabinets get a makeover. With maple, cherry, or any other wood species that does not have an obvious grain, a refinish job will be much easier.

(Kitchen by Lake Bluff Paint & Wall Coverings Ragsdale, Inc.)
After: The island is finished in CW-150 and the rest of the cabinets are refinished in Benjamin Moore’s White Dove.

(Spaces by Lake Bluff Paint & Wall Coverings Ragsdale, Inc.)
Before: Here the graining of oak cabinets is very obvious.

(Spaces by Lake Bluff Paint & Wall Coverings Ragsdale, Inc.)
After: also finished in White Dove.

(Transitional Spaces by Austin Photographers Heather Banks)
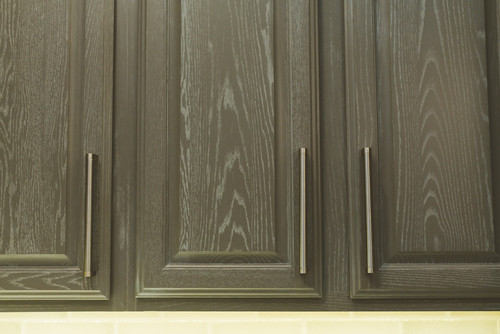
After: If you want to refinish your oak cabinets but you do not want to go to the extra effort of filling in the grain, go for a solid color that won’t show off the grain as much. Or, take a cue from this homeowner and glaze the cabinets with a contrasting color to display the grain. The above cabinets are done in dark and light gray tones.
Final THoughts…
Refinished cabinets can be a great way to update a kitchen, but just remember that every short cut is most likely to result in sacrificing quality. So, if you plan to refinish your cabinetry, be patient. Plan accordingly. Prepare yourself for set backs (I guarantee you that you will have to re-sand at least one door to correct a mistake, and if you are prepared for this, it will less frustrating). Take your time, rushing can lead to mistakes. And most of all, don’t skip steps. I can not stress enough how important the prep work is in getting a high quality finish.
And finally, check back with me later to see how my laundry room cabinets turn out, or better yet, sign up for updates and I will notify you. I will be doing a step by step walk through on how I did it. (Hint: I am going from a dark stained maple to an off white paint color).


Please keep it clean. Comments that do not follow the Comment's Policy may be removed.