istmas tree ornamnetsSeven years ago, I purchase a beautiful 9′, Vienna Pine. You know, the kind with the pre-lit Christmas tree lights? Well, it was wonderful for the first five years. Then, a few years ago the lights began to gradually twinkle out. So, last year after putting the thing together, wouldn’t you know it! Several rows wouldn’t light up.
(This post may contain affiliate links (*). That means that I make a small commission from sales that result through these links, at no additional cost to you. You can read my full disclosure here.)

So, after spending hours trying to find and replace the burnt out bulbs, and after checking all the fuses, I was about to give up. Then, I decided to try one of those light repair guns*. Luckily, that got me through the Christmas season, but it was still a struggle. With me having to constantly get the gun out and click multiple lights every day, only to have to do it all over again the next day, I decided no more. The lights had to be replaced.
Pre-lit Christmas Tree Lights Repair/Replace…
When I unpacked the tree this year, I knew that I had a project ahead of me. My tree was still in very good shape, but the 1300 plus lights were shot. I guess I could have just bought a new pre-lit tree, but mine cost a pretty penny. Even with replacing the old lights with all LEDs, I would still be spending less than half the cost to replace the tree. Plus, LEDs will be perfect for when I get around to flocking my tree, and eventually, I will.
So, LED lights it is! I looked long and hard before deciding on a GE brand in soft white. Of course, a LEDs soft light is nowhere near as soft as the old incandescent bulbs. But, at least they do not have that bluish tint that the regular LEDs have. I bought my lights at Lowe’s, but if you can’t find those, Amazon sells these warm LED lights*.
I have also noticed that Walmart has some GE lights* available on their website. To be precise, the lights that I used were the GE warm white in the green packaging. However, regardless of the brand that you choose, the most important is to be consistent.
If you need five strands, make sure all five are the same brand, style, and color temp. Otherwise, your tree will look funky. Also, if your tree comes in sections like mine, you will likely need a brand that comes in both 100 lights and 50 or 150 lights per strand. You’ll see why when you look at how I determined my light distribution in step 2.
PRE-LIT CHRISTMAS TREE LIGHTS, Step 1…

Now, remove all of the old lights. Since I felt that mine were pretty much useless, I am using wire snips to cut through the jumble of crisscrossed wires that make up my trees old lighting system. Be prepared to spend an entire afternoon just taking all the old lights off. It’s not hard, just a bit tedious.
PRE-LIT CHRISTMAS TREE LIGHTS, STEP 2…

The bottom of the top section had 12 branches. That makes 12 x 5 = 30 + 40 more for the top tips. In other words, the top section gets a strand of 100. From there, I increased the bulbs per branch as I moved down the sections. (as the branches get longer, it will take more lights). This is how I worked out the lights on my tree. (click any image to enlarge).
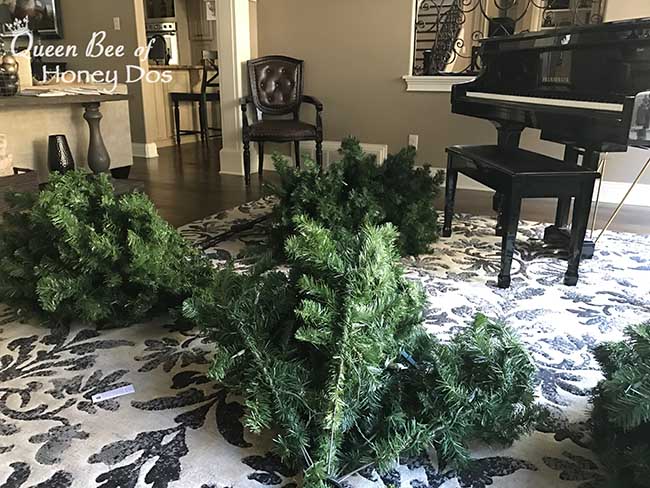
To make things easier, I used the tree stand to hold each individual section as I wrapped the lights. On most sections, the lights needed to go from the interior towards the tip. Then, back along the length and cross over to the next branch. However, on a few sections, the branches were staggered. So, it made more sense to jump from branch to branch, in an up-and-down direction.
Try to make it so that male and female ends will connect at the interior of the tree. If that is not possible, use an orange colored zip-tie to mark the location of the plugs. You will be glad that you did next year when you have forgotten where you ended each strand.
When starting each section make sure that you begin with the female end on the top branches of the section and keep the male end on the bottom branches of the sections. That way you will finish with the plug (male) at the bottom of the tree. Doing this makes it easy to connect your 1st stand to an outlet and leaves a female hook-up at the top of each section.
Tip – to help keep things in place, use zip ties. You especially will want to zip tie the light connections that are made within a section. (i.e. anyplace where you plug the next strand into the previous one). That way the connections that are made within a section are easier to locate should they come unplugged in later years.
As you work your way along the branches, separate the needles so that the wires can be wrapped right up against the metal branch. This will help to hide the wires. Then when you reach the outer tips, just intertwine the lights loosely and to your liking. This will also be beneficial if you ever decide to flock your tree.
Reverse the process and go back down the length of the branch before crossing over to the next branch. (FYI – a few strategically placed band-aids will protect your fingers from becoming cut and raw.) :-) Make sure you leave enough slack at the end of each strand to reach the plug on the next tree section.
Continue stringing the lights, one tree section at a time. Once you finish with one section, set it aside and start on the next section, using the allocated strand length.
Finally…
Assemble the tree sections and plug in each male to the corresponding female jack. I ended up using exactly 1000 lights to get this result. However, the number of lights will depend on your tree size and your personal taste.
When you disassemble your tree this year, just unplug the strands between each section. (The same way that you did with the old lights). Good luck!
UPDATE: Three years later and my lights are still working perfectly. You can check it out on my 2018 Southern Home Christmas Tour. You will also notice that I have flocked my tree, as well. I just did that this year, and will post those instructions next week.

– PIN IT –

– PIN IT –


JJ says
This is exactly what I needed! Like you, I first replaced a bunch of bulbs but now I’ve hit a section with too many out and the gun thingy isn’t working. I was wondering if I should put the entire tree back together because it didn’t occur to me to just put individual sections on the stand. Thanks!
Rachel Lynn says
So glad to help. Next year, you will be so happy you did the work now.
LESLIE STICKEL says
My dad gave me his old Christmas tree – accept, there is no top tier. The whole thing is pre-lit and it’s a beautiful tree. I just can’t seem to find anyone who can provide a replacement for the top tier. Any suggestions?
John martinez says
I have a 9ft pre lit Bristol tree I lost the electrical connection from tree. Where do I find another one to replace lost one.
Jim Cannon says
Hello, Rachel,
I ran into this problem and tried to fix the tree as you demonstrated. I found the task very frustrating, and eventually I gave up and spent the big bucks on a replacement. I hope to get more than three seasons out of the next one (though I do understand the concept of planned obsolescence.)
It would be worth it to me to pay a fee to someone else to do it. Do you happen to know of any businesses (anywhere) that do this kind of thing?
Thank you.
Rachel Lynn says
You could check with a local Christmas lighting company. They may be willing to do it for you.