If you have a miter saw, you may have noticed that sometimes your cuts just aren’t as accurate as you would like. Typically, this isn’t obvious until you are in the process of assembling a project – usually that very last piece – and you notice that the fit isn’t as tight as you would like. This can be very frustrating, but the good news is that your problem most likely stems from your miter saw needing to be calibrated. This is something that needs to be done from time to time. Good news! I am going to show you how to perform a miter saw maintenance for accurate cuts.
(This post may contain affiliate links (*). That means that I make a small commission from sales that result through these links, at no additional cost to you. You can read my full disclosure here.)
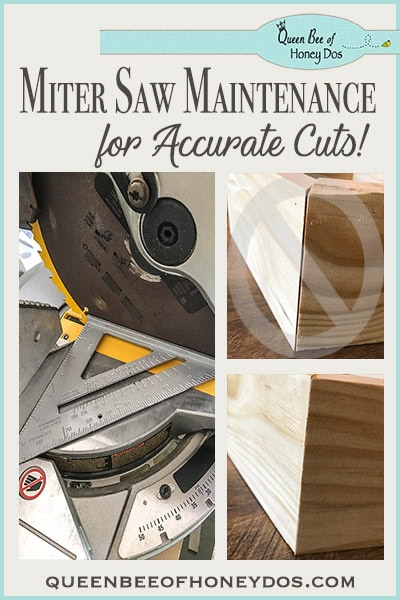
Even if you just bought your miter saw and haven’t had a chance to use it yet, you still need to go through these steps. That’s right, even a brand spanking new miter saw! They rarely come calibrated to the level that will give you perfect cuts. In addition, they will fall out of alignment over time. It’s just part of the effort that it requires to do professional work. Failing to achieve accurate cuts is a big factor in why woodworking projects fail. However, the steps are very easy, and once you learn them, you will be able to perform this maintenance check in no time.
Miter Saw Maintenance for Accurate Cuts – Step 1…
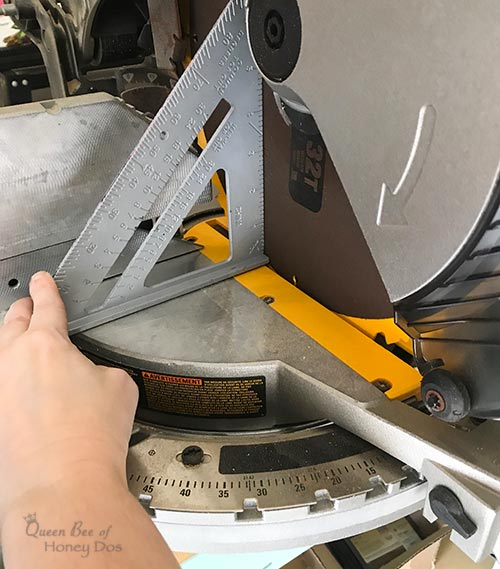
I always begin by checking my bevel gauge. The bevel adjustment is located behind the blade at the rear of the arm. To calibrate this gauge, make sure it is set to zero. Then, using a carpenters square,* lay one side against the table and the other against the blade. What we want is for the blade to be angled exactly 90 degrees from the table. If there is any gap, adjust the bevel until it rests perfectly against the square.
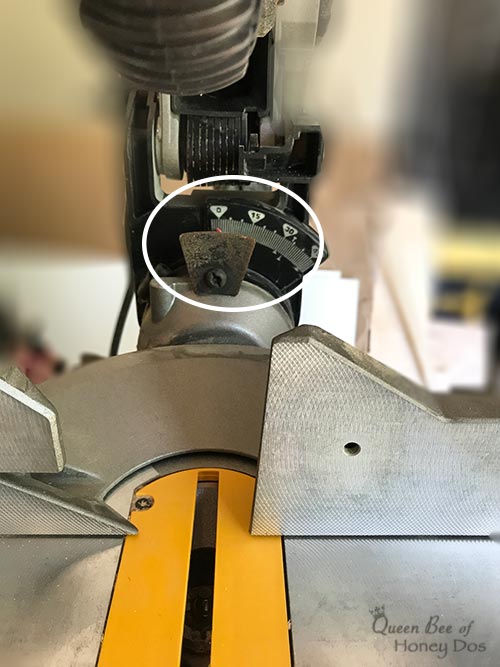
Once you have the bevel set so that it is perfectly square to the table, you will then need to set your gauge to reflect the change. Since, this perfect 90 degrees reflects where “true zero” is, you want to move the pointer to exactly zero. On most miter saws this is done by loosening the screw on the pointer and moving it to zero. If your miter saw is slightly different, you can check your user’s manual to see how to set the gauge.
Now that your bevel reflects a true and accurate zero, change the bevel to a 45 degree angle and recheck using the square. It should now accurately reflect 45 degrees.
Miter Saw Maintenance for Accurate Cuts – Step 2…
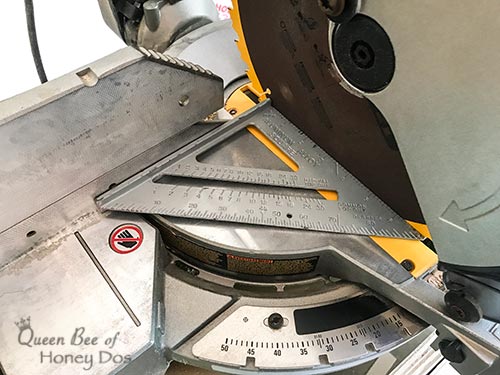
For this next step, let’s make sure the fence is square. To check the fence, make sure the bevel is set back to zero. Then, lay one side of your carpenter’s square against the fence and the other side against the blade. A perfectly squared fence will not have any gaps. If there is a gap, the fence needs to be adjusted. This is done by loosening the bolt holding the fence in place, and moving the fence until it is perfectly square. Once you have one side of the fence squared, use a straight edge to align the other side up with its fence mate.
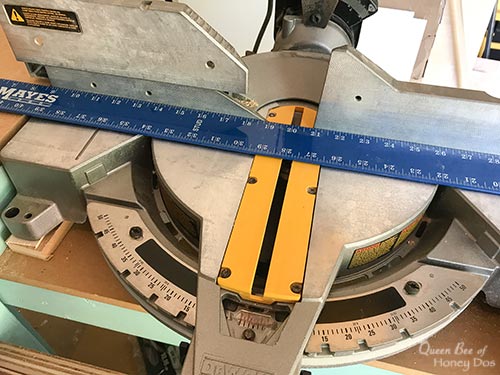
On some miter saws, like my Dewalt miter saw,* both sides of the fence are joined (i.e one piece) and will be adjusted simply by using a straight edge. You may also discover that you have a miter saw that doesn’t allow you to adjust the fence at all. In which case you will instead adjust the miter gauge (located at the front of the saw).
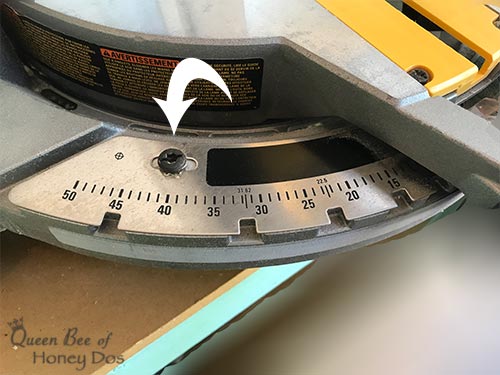
To adjust the miter gauge for a nonadjustable fence, turn the miter adjustment until the fence is square to the blade. Once you have a perfect square, lock it in place. Then, loosen the screws on the pointers and move them until they are pointed at zero. If the pointers on the miter gauge are not adjustable, then you will need to move the gauge itself (above). As you can see on my miter saw, the gauge has screws that allow for it to be moved a small amount in either direction. The method required will vary from saw to saw.
Miter Saw Maintenance for Accurate Cuts – Additional Checks…
In addition to the checklist above, the table of your miter saw should be level. I did not list that because it is rare for these to be off, but if they are you probably will have to buy a new saw.
You also should check your blade. They have a tendency to get a build up of pitch on the teeth after a while. In most cases, you can clean your blades, and they will be back to almost new condition. I use a pitch and resin remover* that I get from Rockler. I also keep a Boeshield kit* on hand, which I use for both cleaning and protecting. Both are just part of my list of workshop item must haves.
Final Comments…

Now that you have your miter saw calibrated, the last thing to do is to run some test cuts. Try doing both bevel and miter cuts on a few pieces and test the fit and angles. If you set everything correctly, you should be happy with the results. If something is still off, go back and recheck, paying close attention to the condition of your blade. It may be time for a new one.
Once you get your miter saw calibrated, why not try out cutting some steeply angled miters. I can show you how to get any angle on your miter saw. Yes! More than the basic 45 degrees. Want to see how to do it? Head on over to this post to see how!
And just a reminder….
I am now posting videos to youtube! It is still in its beginning phase, but I will be posting a new video each week on something “wood” related! Please take a moment and follow me on my youtube channel.

– PIN IT –

– PIN IT –


Mildred says
Thanks for the inf
Rachel Lynn says
Your welcome.
Showgatur Rashid says
Hi Rachel,
You are not only DIY addicted but also an expert DIY tools user. Accurate Cuts are the ultimate goal of the Miter saw, but it’s really hard to fix the saw accurately. I appreciate your skill, simply, you have shown here the easy the miter saw maintenance technique that’s very effective for accurate cuts.
Thanks for the useful article.
Regards
Ashley says
Any advice on how to fix those inaccurate cuts when the wood is measured the correct size already, and no spare wood is readily available?
Rachel Lynn says
Ashley, Oh, I so wish! lol Unfortunately, the only thing you can do once the mistake is made and you don’t have any extra wood is to either alter the entire plan down a tiny bit, or cover it up. In the past, I have used wood putty (for very tiny imperfections), bondo (for larger imperfections), corner brackets, and even corner blocks. Sometimes, it is just easier to buy another piece of wood, though.