Hello again, all of you lovely DIYers! I have my friend, Dale, back with me, today. He just finished making this beautiful cutting board for his daughter, and we thought we would share this project with you. Author: Rachel Lynn, Contributor: Dale Stallings
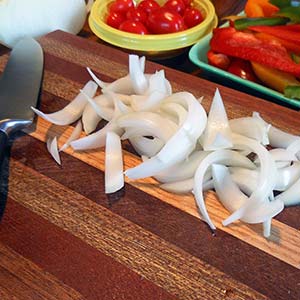
It is perfect for any beginner because you can do it without needing any of the big-ticket items that are necessary for a lot of projects.
Also, you can really impress your friends and family with this beautiful piece. So, are you ready to learn how to make a cutting board???
(This post may contain affiliate links (*). That means that I make a small commission from sales that result through these links, at no additional cost to you. You can read my full disclosure here.)
Things to Try While Making Your Cutting Board
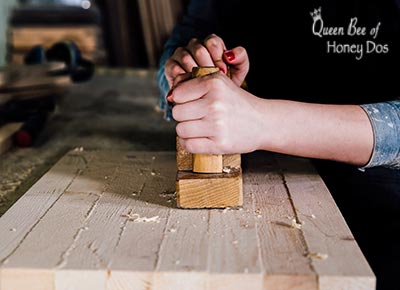
Before we jump right into this simple DIY, I want to first point out that this project is a great opportunity to learn a few skills assuming, of course, that you are a beginning woodworker.
For instance, this project just screams for a hand planer! It is a small area, and should already be almost perfectly flat. So, you really can’t hurt it by using a planer, but you can use this project to learn how to use that tool.
However, you don’t have to use a planer for this project. Sanding will get you to the final stage with very little effort. (Be sure to check out my post on all the available options for flattening a board!)
You can sand the edges to remove the sharp corners, or you can learn to use a router to create a round over. But we will go into that in a moment. First, let’s get to the materials.
Materials Needed
- hardwood selection (or kit)*
- waterproof/food-safe wood glue*
- clamps*
- sandpaper/block
- cutting board oil*
- block planer* (optional – this one is perfect for small jobs)
- router* (optional)
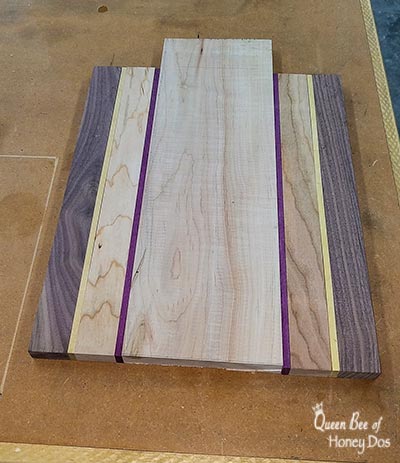
To complete this project you will need a selection of hardwoods that are 3/4″ thick or more, or you can purchase a kit* that is ready to build.
The cutting board we’re making started out as a kit and had some curly maple added to it.
The wood combinations for the above board are walnut, yellowheart, cherry, purpleheart, curly maple, purpleheart, cherry, yellowheart, and walnut (in that order).
You can select other types of wood or do different combinations, but you should only use hardwood that has tight grains for making a cutting board.
For instance, pine is extremely soft and would not be a good option. Oak, although very hard, has an open grain that will catch and hold food particles. So, it is not a good option, either.
For the other materials, you should make sure that you are using waterproof and food-safe wood glue. I generally use Titebond III, but there are a variety of options out there.
You also want to use an oil that is appropriate for cutting boards and will not go rancid. Mineral oil is a good choice.
I recommend reading my guide on cutting board materials to get a complete understanding of what you should and should not use when building a cutting board.
Instructions for Making a Cutting Board
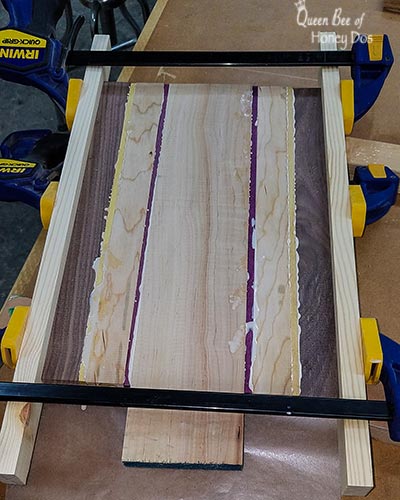
Before starting, lay out the wood until you get a visually pleasing pattern.
Then, apply an even layer of glue to both sides of each piece of wood, and clamp them in place.
Tip – do not over-tighten the clamps. You only need to have firm pressure – just enough to hold the sections so that the joints are snug.
Note – You will notice that Dale used two scrap boards between his clamps and the glue-up sections.
This allows the pressure from the clamps to be distributed along the entire length of the project. So, we get nice even pressure.
Wipe away any excess glue, and allow it to dry overnight.
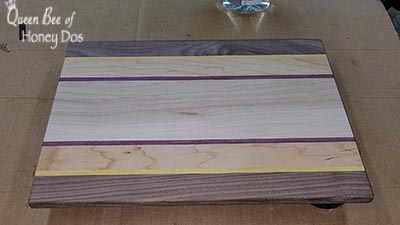
Once the board is dry, you will begin to shape and smooth it as needed. Some people like to cut their boards into shapes.
You can do that, or you can just use a basic rectangle. For this board, the rectangle shape was chosen. It provides the largest cutting surface.
To smooth down the board, sand or use a hand planer to shave off any high spots.
For this board, a router with a 1/8″ round-over bit was used along the outer edges.
However, if you do not have a router, you can just sand the corners down to create a smooth round-over.
This piece was sanded down, using different sandpaper grits, ending with a 220 grit for the final finish.
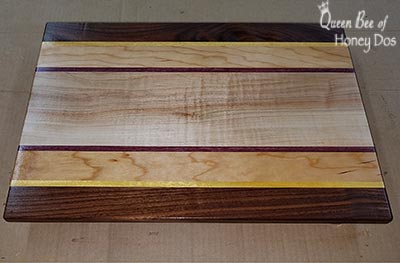
Once the board is shaped and sanded to your liking, wipe away all of the dust residues and apply an oil finish. Again, be sure to use a food-grade oil that is appropriate for cutting blocks.
Now that you know how to make a cutting board, go build one, and be sure to brag to your friends and family! I will be placing mine in my knife/cutting board drawer holder.
Want a bigger board? Check out my double-sided pastry/cutting board. It’s a beaut!
More Project Collaborations Done With Dale!
If you want to see more of the projects that Dale and I have collaborated on, I highly recommend checking out my post on building a rolling lumber cart.
We also have a nice little dowel rod trivet that goes well with this cutting board. It requires a bit more skill than the cutting board but is still great for beginners.
Finally, I direct you to Dale’s adorable wooden toy boat. Perfect to do as gifts for kids or for introducing kids to the wonderful world of woodworking.


2+2 chest of drawers says
Amazing ideas. I love this. Everything looks very beautiful. Thanks for sharing this post.