Shaker cabinets are one of the most popular choices for cabinet styles. They are sleek and clean looking while maintaining just enough detail to avoid being labeled plain. They can work in pretty much any design style, and lucky for us, they are one of the easiest to build. But, not everyone knows exactly how to build a shaker door. So, in this post “How to Build Shaker Doors” we will focus on instructions for constructing basic shaker doors.
How To Build Shaker Doors…

Before we get started on the instructions, you will need to be familiar with safety gear (educate yourself if you don’t know what that includes) and with the parts of a door, of which there are three.
1) The panel – obviously this is the center of the door. 2) Rails – these are the boards that run horizontally across the bottom and the top of the doors. 3) Stiles – these are the boards that run vertically across the sides of the doors.
Materials Required for Shaker Doors…
While there are several ways that a door can be constructed, this method is widely used and is an acceptable way to build quality shaker doors.
It can be done using a dado blade, but for the purpose of the beginners, I am demonstrating just using a basic blade. If you need instructions for building cabinet boxes, they can be found here.
To construct shaker doors, you will need
- Quality 3/4″ wood for the rails and stiles – I am using poplar boards from Lowes. However, you will want to consider the final finish before choosing the type of wood. Since I plan to paint these, I am not concerned with anything more than the boards being straight, flat, and free of defects. If I were going to stain these, I would probably have chosen cherry. However, poplar stains up very similar to cherry. So, it is a good substitute.
- Quality 1/4″ plywood to use for the panels. – I am using basic birch plywood for my panels, but again I plan to paint them. (Tip: If you are building a kitchen cabinet door or a door that will receive a lot of harsh treatment, 1/2″ panels may be the way to go. I am using these doors in an area that will receive very light treatment, so 1/4″ panels will suffice. (If using 1/2″ panels, adjustments will need to be made to these instructions).
- Wood Glue
- Clamps
- Table saw
- Orbital Sander or sanding blocks
How to Measure and Cut for Shaker Doors…
Measuring
I will assume that you know the size that you need your cabinet doors to be, so with that in mind, let’s get to the math. The easy part is the stiles.
They will be cut the actual length desired for the finished length of the door. In my situation, I needed doors that measure 30″ in length x 17″ in width. So, my stiles were cut to 30″.
For the rails – I am using 1/2″ tenons and 1/2″ grooves, and my boards are 2″ wide. So, the formula will look like this: desired door width – (stile width x 2) + 1 = rail length.
Or in other words, 17″ minus the 4″ width of my combined stiles. Then, add back the 1″ needed for the tenons. That total will be 14″ rails.
For the panels – The width will be the same as the rails (in my case 14″) and the height will be the stile’s length – (rail width x 2) + 1. Since my rails are 2″ each in width that means 30″ – 4″ + 1″ =27″
Making Grooves & Tenons for Shaker Doors…
Grooves and tenon is the method used to build professional shaker doors. I know you may have seen some DIY doors constructed using pocket hole jigs. Maybe you have done a few yourself.
Those are okay if you are just starting out, but it is not too difficult to make shaker doors the correct way. This is just one area where I would recommend not using pocket hole screws.
I suggest using a scrap piece of wood to practice on, before trying to cut the actual grooves and tenons for the doors.
How to Build Shaker Doors – Step 1
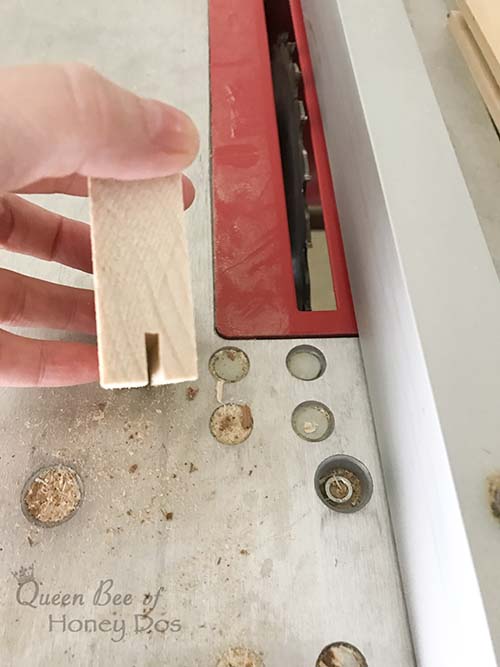
Let’s get the table saw set up to create the grooves (or dado) in the stiles. You want to get the groove perfectly centered in the stiles and cut 1/2″ deep.
So, you should set your table saw blade to be raised 1/2″ and the fence set approximately at 1/4″ away from zero.
Run a test to determine if the cut accurately cuts a groove 1/4″ away from the edge. If not, fine tune your fence placement.
Once you get the first groove cut in the stiles, move the fence 1/8″ further away from the blade and make a second pass in the stile.
Continue making 1/8″ adjustments and passes until the groove is wide enough to make a snug fit on your panel wood. It should only take 2-3 total passes.

You should end up with a stile that has 1/4″ left on each side of the groove and about a 1/4″ groove down the center.
To make the stiles quicker and easier, cut the grooves in the boards before cutting them into the individual stiles and rails.
HOW TO BUILD SHAKER DOORS – Step 2
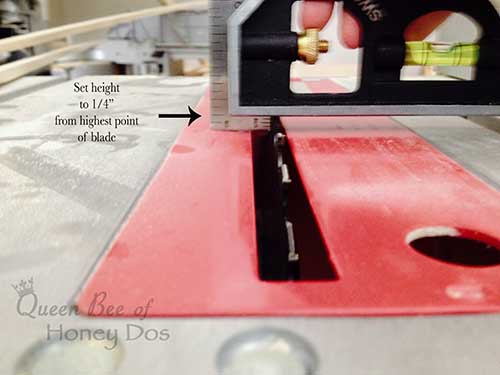
To cut the tenons, lower the blade to be just 1/4″ above the table. Make it as accurate as possible.
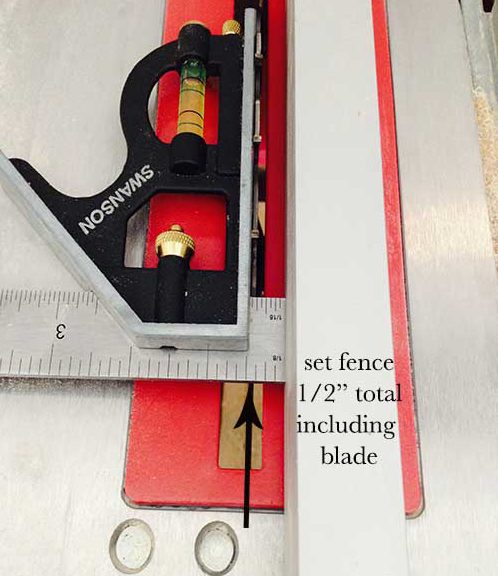
Then, set the fence so that it is 1/2″ away from the far side of the blade. Again, do a test run to get your placements right.
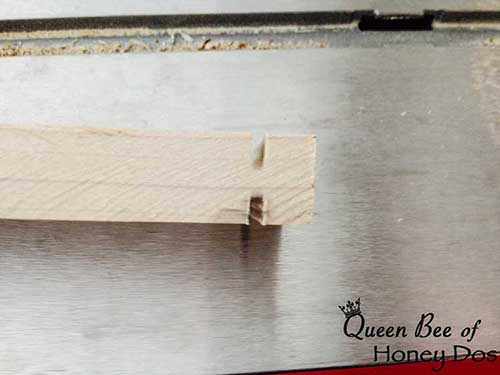
Make a pass on both sides of each end of the rails. The notch should be exactly 1/2″ from the end of the rail. If not, make adjustments to the fence until it is accurate.
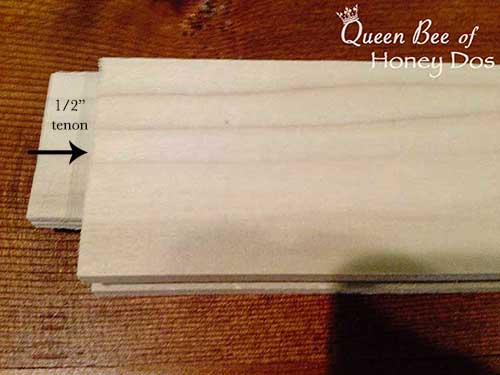
Begin moving the fence closer to the blade in 1/8″ increments, making a pass over both sides of each end with every adjustment.
Keep doing this until the tenon has been completed.
You can see how the passes remove the groove area that was previously cut, leaving behind just the tenon.
Test the fit of the tenon in the stile grooves. It should fit snugly but not overly tight or loose.
Step 3

To assemble the door, place a bead of wood glue into the grooves of the stiles and rails.

Slide the bottom rail into the ends of the two stiles. Then, slide the center panel in place. Finally, slide the top rail into place.

Use bar clamps to hold the door until the glue fully dries.
NOTE – Be sure that you only tighten the clamps just enough to hold.
Do not apply any extra pressure with the clamps or attempt to over tighten them. This will cause the stiles/rails to bow upwards. You only need a light hold, similar to the pressure applied when holding it with your hands.
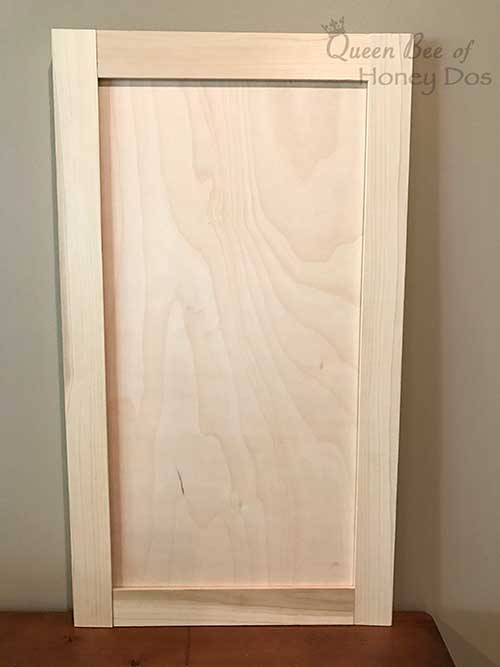
After the glue has dried (24 hrs), sand the door to remove any raised seams or ridges. Make sure to go over the entire rail and stiles and not just the seams. Otherwise, you may end up with dips.
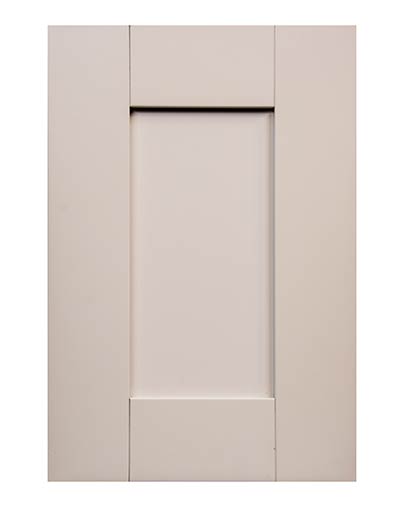
Finish the door in your preferred method (stain or paint) and hang on your cabinet.
Final Thoughts…
Keep in mind that learning how to build shaker doors is not difficult but may take several passes to get everything just right.
Getting grooves and tenons cut perfectly may take a bit of practice. However, with a little attention to detail, anyone can become an expert at making them.
So, if this is your first time attempting doors, just buy a little bit of extra wood, and practice at getting to know your table saw, as that is really where getting a perfect result will be made.
Don’t expect the cuts to be accurate with your first pass. But once you find that sweet spot, write it down or mark it off with some tape. And as always, make sure to use your safety gear!


Emma Jones says
This is such great tutorial! I love the look of shaker cabinets, and I also love DIY projects! We ended up buying a shaker cabinet kit that included everything that we just had to assemble into cabinets because I was too intimidated to try to do it all myself but didn’t want to pay a ton. I wish I had seen this article before then! I think I could totally have done it all myself! Thanks for sharing!
Rachel says
Thanks Emma!
Les says
I have a computer desk at home that has a shaker door. I studied this door and could not figure out how to do it until I saw this great tutorial! Thanks Rachel!
Rachel Lynn says
Les, I know, it’s one of those things that seems complicated until you see that it isn’t. :-) Glad I could help!
Ray Rau says
Hi Rachel. I’ve been a cabinetmaker for 40+ years. A few points:
1- Cut the panel slightly smaller so that it floats in the frame. This allows seasonal movement.
2- NEVER glue the panel into the frame, it prevents seasonal movement and can ruin the door.
3- I usually finish the panels before assembly so that when there is movement you don’t see any bare wood on the panel.
Rachel Lynn says
Ray Rau,
Ah, ask 10 different woodworkers how to do something and get 10 different answers. ;-) These are good points, and your method is the method that I follow for solid wood panels. However, this tutorial is using a plywood panel, which as you know will have minimal movement, virtually none. Also, glue on these panels will prevent rattle and create a more rigid door. However, I certainly appreciate and welcome your input. I know woodworkers all have their own style and can be quite passionate about it. (myself included) It certainly won’t hurt to allow them to float, but I prefer to glue. :-)
Neva says
Do you have a router and a router table? For myself, I much prefer making the grooves on the router table. I abhor moving the fence on the table saw over and over. (My table saw fence isn’t the best quality and takes a lot of fussing.) If you don’t have a router, you might want to invest in one. They. Are. Great! I do use the table saw for the tenons, but I use the table saw sled I built with a stop block clamped 1/2 ” over (or however long the tenon is). Then I just move the rail over a kerf at a time until it hits the block. So fast. I spent today making doors and being grateful for my router and my sled!
Rachel Lynn says
Hi Neva,
Thanks for stopping by! Yes, I have a few routers which I love, as well!
You are on the right track with using the sled and stop block. Definitely keep it up. However, I have to keep in mind that not all of my viewers are that far along in their skill sets. So, because with this post I was trying to offer a very simple step-by-step on the process, I tried to limit myself to just the basics tools and processes that I felt any beginner could understand. It also shows that you can do a lot with just a very little. ;-) I plan to add several other door construction options in the near future that will be more detail oriented. But if you want to see something now, you can check out my Instagram pageto see some of my other work. I’ld love to have you come visit! :-)
Marcus says
Great Tutorial! Quick question.. Where does one find 3/4″ Poplar boards? It seems at my local Home Depot or Lowes all I am able to find is either 1″ or 1/2″. I’m wondering at the time of this writing that maybe it was more common but I just don’t see it anywhere on either of the websites. Am I missing something?
Rachel Lynn says
I suppose I need to clarify that in the instructions. I was referring to the actual thickness for demonstration purposes. The nominal thickness is 1″. So, you would purchase the 1″ poplar from your big box store.
Anonymous says
Makes sense! Thanks!
KvG says
Not sure if my previous comment posted, or not. Thanks for the article. I’ve read both this, and your article on face frames this morning.
Assuming people know what size door they need is, well…assumptive. ;) I’m struggling to find information on sizing them for overlay doors, but I think your face frame article mentioned having either a 1/2″ or 1″ overlay. I’m curious as to what scenarios you would use either.
I have three cabinets that will be attached to each other. The outside flanking cabinets will have one door each, swinging to the outside. The center cabinet will have two doors with hinges on the outside.. What do you suggest as the overlay dimension?
And, at the risk of asking too many questions…back to the face frames…what do you suggest as the internal overhang for the frames…how far they overhang the inside of the cabinet?
Rachel Lynn says
Yes, I see both comments. Since they are duplicates, I am going to just push this one through. To answer your questions, let’s first keep in mind that face frame width, door width, and hinge ability all work together to dictate the final look. So, to get a full overlay, I, personally, use 1 and 1/4″ face frames on each cabinet box, paired with 1″ overlay hinges, and doors that are built to the width of the cabinet box. Full overlays can/should be adjusted when there is an obstacle in the way. For instance, I would use either the 1/2″ overlay hinges and use a wider face frame on the side of the frace frame where cabinets meet at a corner. This keeps the cabinet doors from hitting each other. 1″ overlay hinges (again, assuming 1 and 1/4″face frames) will give a full overlay with just enough room to allow two cabinet doors to close against each other without rubbing and/or to give adjacent doors room to open/close. For the face frame overhang, I prefer 1/4″ on both the inside and outside. You can see the setup described above on my current kitchen cabinets, which you can see in this post.
Whitney says
Thank you for this clear tutorial! I’m painting my doors- the inset panel is 1/4″ plywood, which measures slightly under the 1/4″ grooves. Do you suggest caulking the gap or leaving it loose for the wood to expand?
Rachel Lynn says
Whitney, if you are okay with the movement, you can leave it loose. However, I personally do not like the panels to rattle. You can caulk if you like to close the gap. You can also glue in mitered 1/4″ molding.
Martha says
This tutorial was like having you stand next to me as a good buddy telling me what to do and explaining the why!! Exactly what we need when trying something new. You rock!