One of the easiest, and yet scariest DIYs, is to build cabinet boxes. There are so many different techniques that are used to build cabinet boxes, and every builder will have a preference. I frequently get questions pertaining to my method of choice. So, today I am going to go over the two most common ways on how to build simple cabinet boxes for both the upper and lower cabinets. I promise, they really are not difficult to make. So, jump right in and try it yourself!
(This post may contain affiliate links (*). That means that I make a small commission from sales that result through these links, at no additional cost to you. You can read my full disclosure here.)
How to Build Cabinet Boxes…

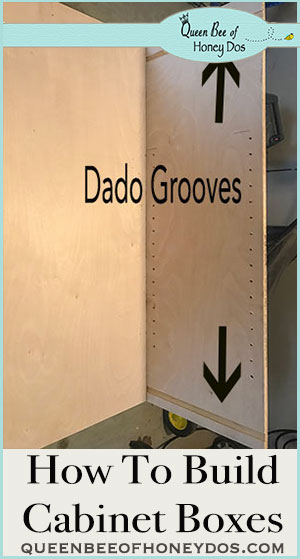
Before we get started, I thought that I would include this photo here. I like it because it shows simple boxes without frames or doors, which allows us to see just the bare bones of a cabinet.
If you look closely, you can even see where the screws are placed along the sides and the backs. (Just an FYI – this article will show how to build the boxes – frameless. We will not get into face frames or finishes in this post).
That being said, lets first go over the basic tools for building a cabinet box. For cabinet box construction you will need:
- 1/2″ or 3/4″ plywood. Cabinet grade birch is typical and can be found in all big box stores. 1/2″ thickness is also typical, but I sometimes use 3/4″ (especially for frameless cabinets).
- 1/8″ plywood for the back of the cabinets (Note – this is the common method for building cabinets. I typically like to use the same wood thickness for all sides, just because I like a sturdy back. The only time I use 1/8″ on the back is if I am doing a large quantity and want to save money. Either is fine, and I will explain both ways below)
- Drill/screwdriver with the appropriate bits.
- Kreg pocket hole jig* and pocket hole screws – my preferred method. (you can read more about those here). A typical method is to use a staple or nail gun. I will explain that as well.
- square
- tape measure
- table saw (you may be able to get by with having the store cut your pieces for you depending on the other tools available to you).
- router (optional) good for making fast and precise grooves. Use as an alternative to doing dados on a table saw.
(To see my recommended workshop tools, go to My Amazon Store. Everything on display is items that I like and are great for beginners).
How to Build Cabinet Boxes for Walls – Common Method
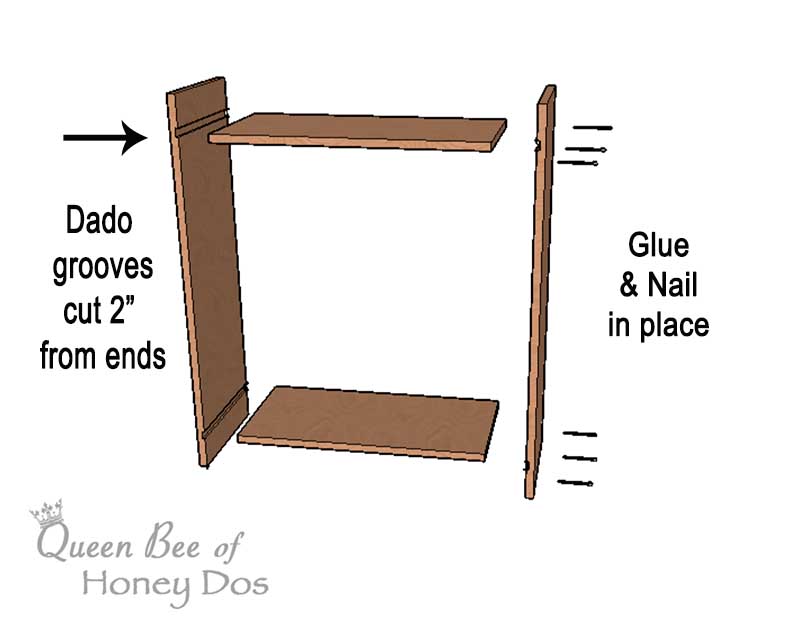
Standard wall cabinets will be 12″ deep. So cut the sides 12″ x the height you need, and the top and bottom section should be cut 12″ deep x the width you need.
If you are adding face frames, take that thickness into account. For example, if I am adding a 1″ face frame thickness, I cut my plywood to have a finished depth of 11 1/4″.
The above image is demonstrating a common cabinet construction. A dado groove is placed at the bottom approximately 1-2 inches from the bottom edge.
Another dado groove is placed the same distance from the top edge. (The space left at both the top and bottom is good for allowing a face frame to be attached with the correct amount of overhang. It also provides space to hide under cabinet lighting. For cabinets without face frames, you will want to place the shelves flush with the top and bottom).
Glue and nail or screw the top and bottom shelves in place, making sure that they are square.
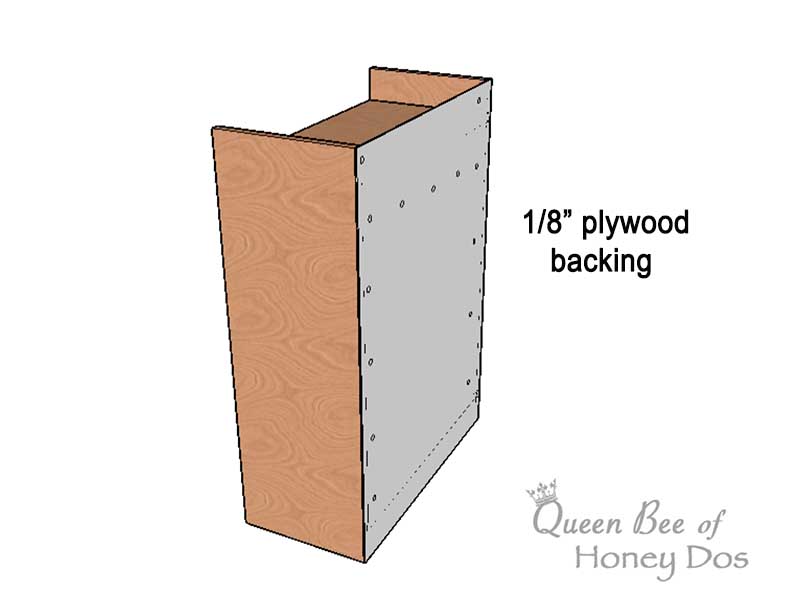
Next, place the 1/8″ backing on the back and screw/nail in place.
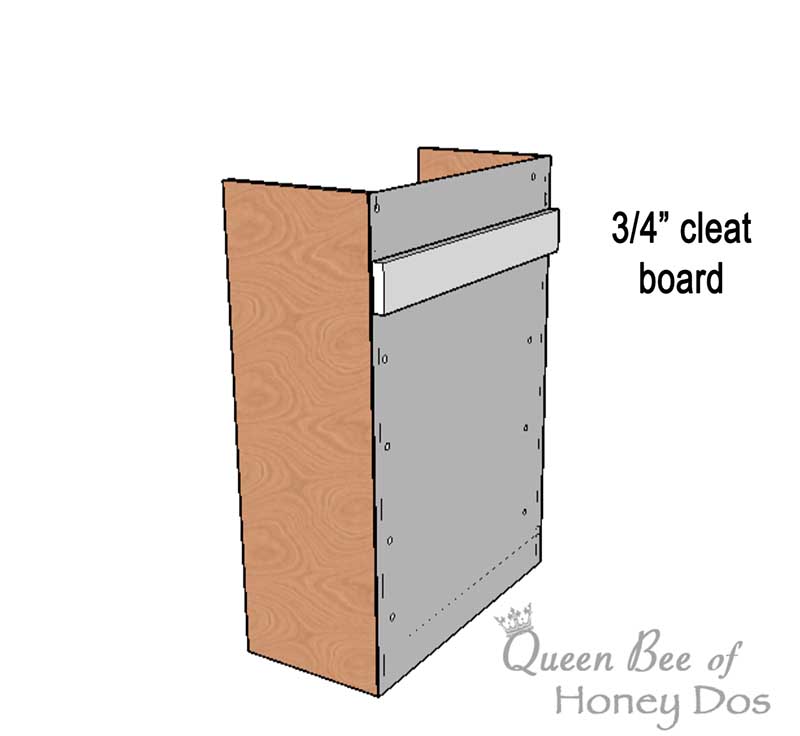
Finally, add a strip of the cabinet plywood across the back. (my images show 3/4″, but if you are using 1/2″ plywood, that is what you will use here as well.) This strip will serve as a cleat to screw through when hanging the cabinet.
My Method…
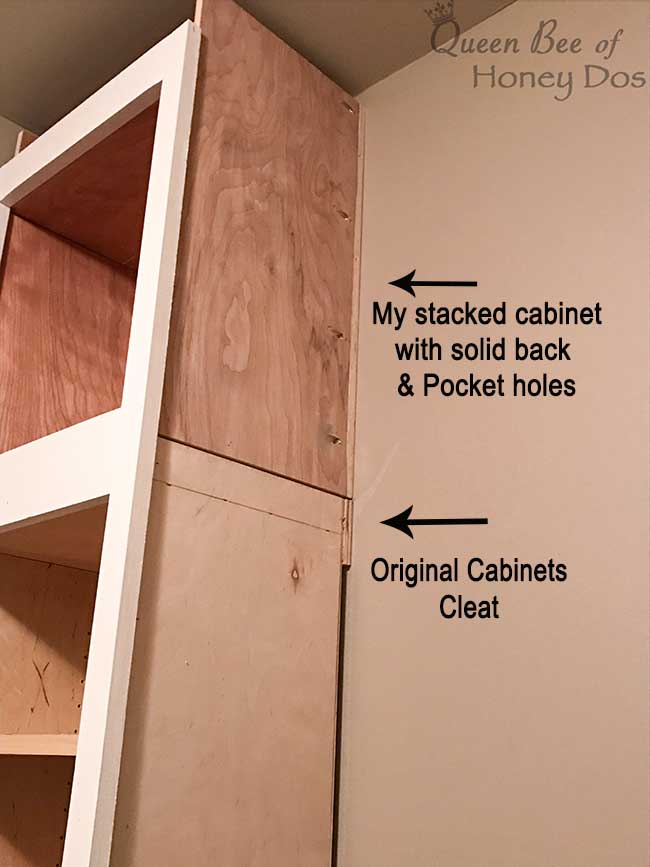
Ok, so now that I have gone over the construction for a standard wall cabinet, I want to show you how I build my own cabinets.
It is not much different, but I feel like these are better constructed. However, if you choose the other way, you will still end up with a good quality box.
In the image above, I have a standard wall cabinet (stripped down) that was built by someone else. I wanted to add a stacked cabinet above it. So, this is a good demonstration of the difference in the backs.
You can see the lower cabinet has a 1/8″ back and a cleat strip along the back. You can also see that the top shelf is stapled in place (along the pencil line).
My cabinet (upper) has a solid back and everything has been screwed in place with pocket hole screws. All of this will be later covered with a side panel, but you can see that the solid back will allow me to attach it to the wall studs anywhere along the back.
The color variation between the cabinets is due to different wood types. The bottom is a clear finish on maple and mine is a clear finish on birch. Since doors will be going up, no one will ever know that the interior is slightly different.
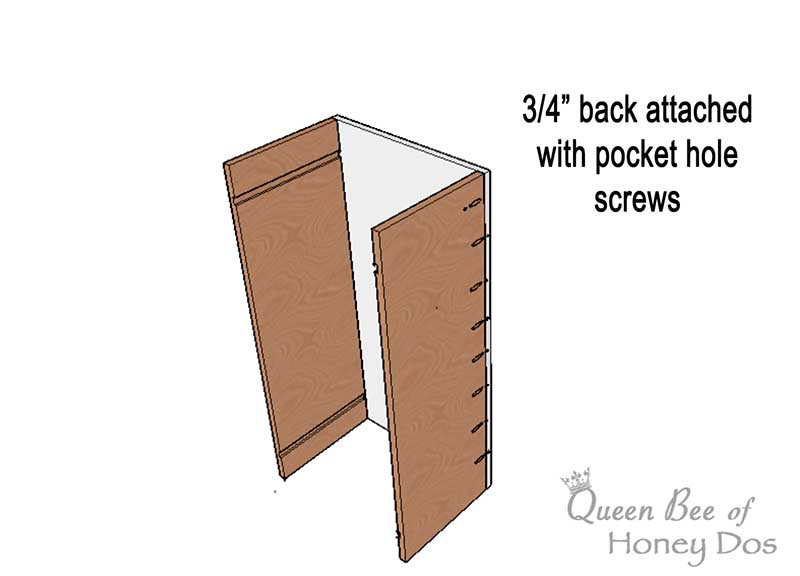
Now that I have shown you an actual example of the differences, let’s go over the construction. Remember it is just slightly different from the 1st set of instructions.
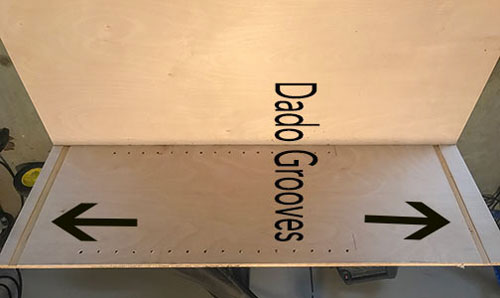
I still dado a groove for the top and bottom shelves first. Then, I drill out pocket holes along the back edges of the sides. (the holes will go on the exterior side of the cabinet). Then, I attach the back with the pocket hole screws.
Next, I drill pocket holes along the top of the top shelf and the bottom of the bottom shelf (not shown in the image). Once the shelves are slid in place, I attach them to the back and the sides with the pocket hole screws. And that’s that. Easy peasy!
How to Build Base Cabinet Boxes – My Method
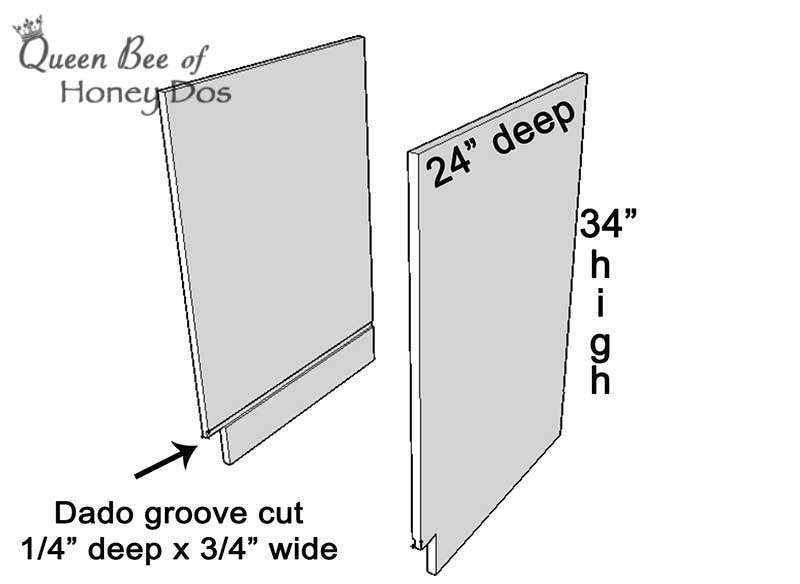
All base kitchen cabinets have a standard size of 24″ deep x 34″ high unless they are custom. Bathroom cabinets are typically 20″ deep. (remember to take into account face frames, if they will be added).
The toe kick (if desired) should be cut to be approximately 4″ high and around 3″ deep. However, these can be altered to your preference or left out completely.
Set the groove just above the toe kick (4″ from the bottom). We will not need a groove at the top, because we will not be adding a top shelf.

Again, drill pocket holes along the back edge of the sides and attach the back with the pocket hole screws. Be sure to check that it is square. You will notice that I am once again using the same thickness for the back.
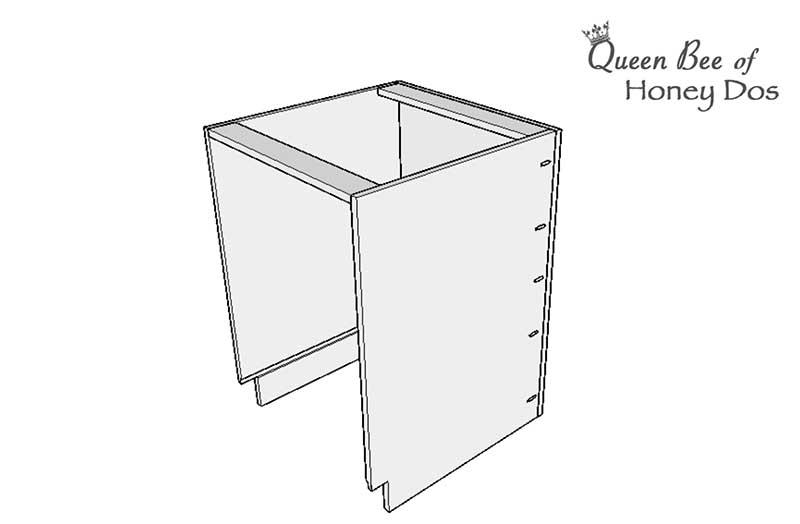
Along the top front and back edges, place a 4″ strip of plywood. Use the pocket hole jig and screws to attach it. These are for support and to help keep the box square. So once again, check for square.
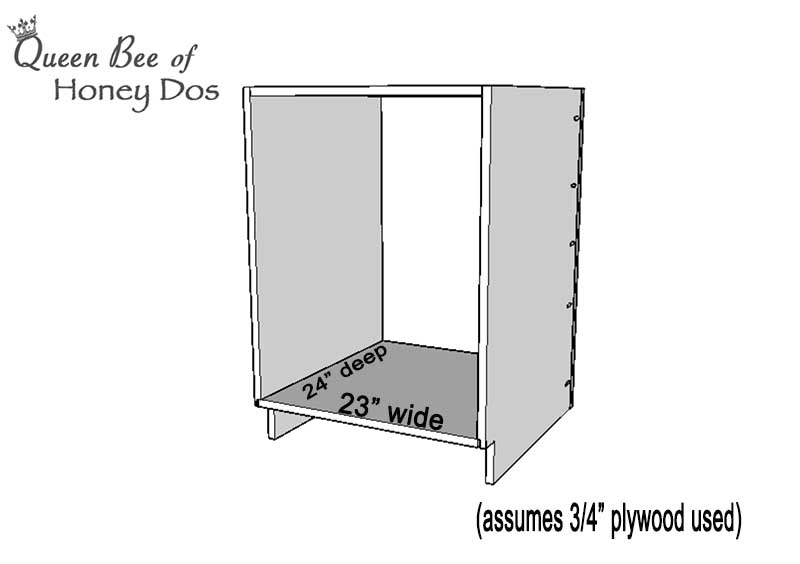
Next, drill pocket holes into the bottom of the bottom shelf along the edges that will face the sides and replica back.
Finally, slide the lower shelf into place and attach it to the back and sides. The screws should be hidden on the bottom of the cabinet.
Customizing Cabinets
Now that you understand the basics of building a simple cabinet box, you can move on to customizing your builds to fit your needs.
You probably will want to add some drawers and doors. The style door that you choose will be what gives your cabinets their personality.
Right now, shaker doors are the most popular style of door for cabinets. You can see how to build shaker doors, here. FYI – these are the doors that I am adding to my laundry room stacks from above.
You may also want to consider making your cabinet shelves adjustable. This will allow you to add more shelving when needed, move shelves up and down to better fit items, and to easily make alterations in the future.
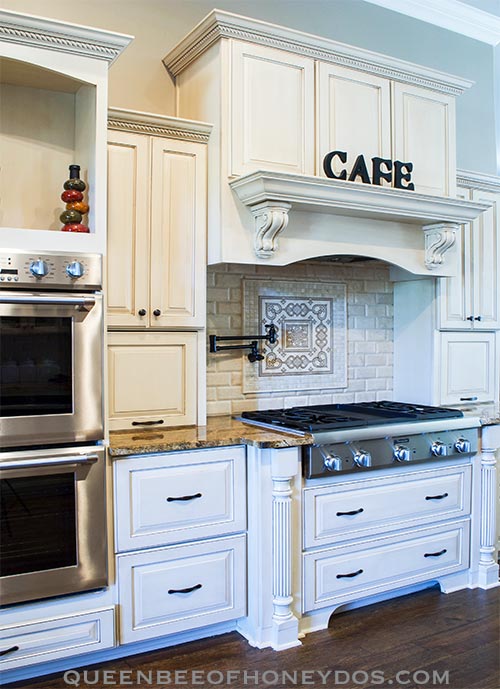
Once you get into building your own cabinets, you can really customize them into a designer quality set. Just taking a look at my kitchen, you can see some of the things that I did to make my kitchen my own.
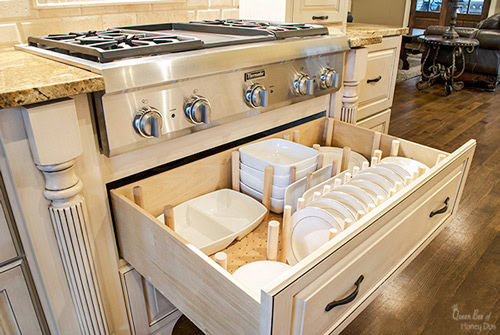
I added pullouts in place of space fillers. Then, turned those pullouts into spice storage on one side and a knife block/cutting board drawer on the other.
Final Thoughts…
I hope these sketches have helped you to better understand the construction of cabinet boxes. We will be getting into face frames and finishes soon. :-)


Anonymous says
Hi thanks so much for the easy to follow directions. Question, what do you make the dado groove with? Router or table saw? Just considering my options in what to buy.
Rachel says
You can create the groove with either. I personally use my router. If you are choosing just one piece of equipment, I would say to go with the table saw first, because it will allow you to cut your wood as well as create tongue and/or grooves. To make it easier, you can get a dada blade for a table saw.
Rachel Porter says
Everything is easy if you have the complete tools required for the task. For the cabinet, I like the dado groove cut design.
Rachel Lynn says
True, the correct tools makes life a lot easier.
Tracy Totty says
Hi Rachel
I am a senior woman on a very fixed budget so I wondered about having the store cut my wood. You said it depends on what other tools you have so what would those be? I have read that it is most important for the cabinets to be square so how do you tell and if the store cuts the wood I’m thinking it would be pretty rough and not super accurate. The wood comes in 4×8 sheets that are heavy and awkward so I wondered how you manage that, although you probably have a really big table but I would be working on a screened in porch as I don’t have a garage. My cabinets are knotty pine from the 60’s and were built on site. The sides of the bases are made of knotty pine paneling and my uppers have shelves that were placed in grooves and I want to cut them out somehow and make them adjustable. I wondered if you think I should replace bottoms or maybe use Bondo to fill in the tongue and groove panel sides and try to replace bottoms and doors. I would really appreciate any advice you might have for me. The bases you built don’t seem too bad I just don’t have a great setup for a table saw. Anyway I love your site.
Thanks
Tracy
Rachel Lynn says
Hi Tracy! You are correct in assuming that the hardware store will not provide you with dead-on accuracy. But what you can do is have them cut the 4×8 panels into more manageable sizes. Then, you can get a cheap circular saw to make your cuts. (FYI – a good blade on a cheap Skil saw is much better than an expensive saw with a low-quality blade). You can use a straight edge (I like melamine boards) as a guide to get accurate cuts. Check with a carpenter’s square. For a really low-cost solution to your problem, remove the shelves and cover the interior sides of the cabinet with 1/4″ plywood finished to your preference. Cut new shelves from 1/2″ or 3/4″plywood. Grab a Kreg shelf pin jig and follow my instructions for making shelves adjustable. For the doors, the cheapest and easiest to DIY without a table saw or other specialty tools would be to make panel doors from 3/4″ ply. You can trim those out with molding or leave them flat for a modern style. If you want doors that are more elaborate (shaker or raised panel) it may be best to order those. Check out Barker’s Doors. They do nice quality cabinets and have detailed videos on measuring and ordering replacement doors.
Janae says
This is article is great. I worked for a cabinet shop for a long time, and while you should leave it to professionals, I think this tutorial pretty much covers everything. Trying to find something to help reference for a friend. Thanks!
Lisa Joy says
Thank you loads. Came across this and am beyond grateful for the info. Very helpful.