It has taken me a while, but I finally got around to building some honeycomb shelves. As part of my office makeover, I thought that a collage of honeycomb shelves would look nice and add a little extra wall storage. One thing that I have noticed with other DIYers’ methods was that the build was a bit awkward. There are six sections in each shelf, so getting them to fit together correctly was causing some people to end up with the last piece slightly out of sync. So, I thought I would show you how to build and hang honeycomb shelves using my construction tricks.
(This post may contain affiliate links (*). That means that I make a small commission from sales that result through these links, at no additional cost to you. You can read my full disclosure here.)
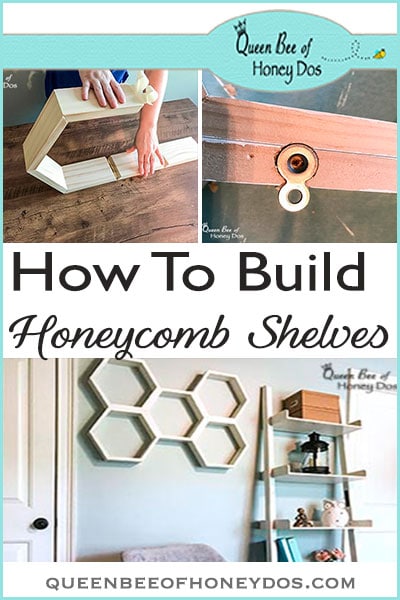
How To Build and Hang Honeycomb Shelves…
Honeycomb (or hexagon) shelves are one of the easiest woodworking projects that you will find. I know that the angles may be intimidating to some of you, but they really are not that hard. In fact, this is one of the first instructional projects that I have beginners tackle. It is great practice for assembling pieces with bevels and the size is perfect for learning this skill (neither too large nor too small for the hands).
Materials…
The materials needed for this project are minimal. To make each section you will need the following:
- Wood glue
- masking tape (trick to making assembly easier)
- quality 1x4 lumber
- paint or stain of choice
- figure 8 desk/table top fasteners*
Tools…
- miter saw
- Pin nailer (optional)
See it in action or, for more details, continue reading below! And if you like the video, please be sure to subscribe to my Youtube channel.
How To Build and Hang Honeycomb Shelves – Instructions…
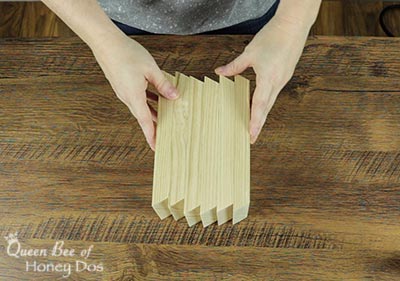
To make the cuts on your miter saw, set the bevel to 30 degrees, and cut 6 sections at 7″ each, with bevels on both ends. The bevels should be facing away from each other on each end. If using a table miter saw, it is best to set up a stop block to get each piece exactly the same length.
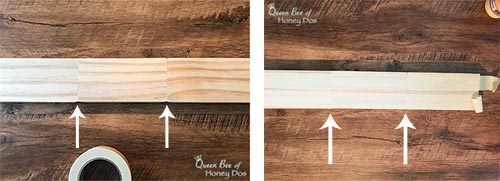
Sand off any burrs and splinters and and smooth out the rough places on each piece. Then, place each section face down in a straight line with the ends butted against each other. The long side should face up so that you can not see the beveled angle. Use two strips of masking tape to hold the sections in place. Leave just a little bit of tape hanging from one end. (first image shows wood butted together. Arrows indicate seams. Second image shows masking tape placed along sections).
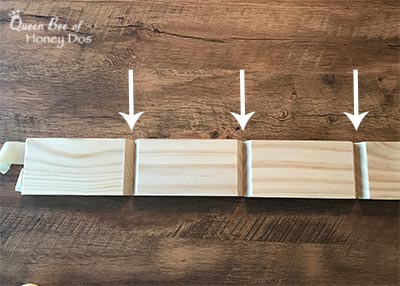
After you have the sections taped in place, carefully flip the entire line over to expose the beveled cuts. Now, apply a bead of glue to each bevel (arrows). Don’t over do it or you will have to clean up the excess. A very this bead will suffice.
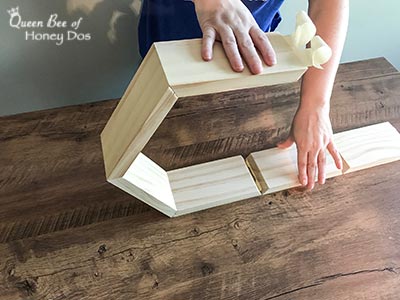
Next, begin to roll each section up so that the butted bevels are joined. Continue rolling until you get the first section to the top. Then, start with last section that is still laying on the table, and bring it up to connect with the top piece.
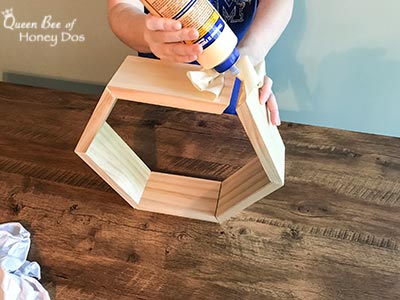
At this point, you will need to add a bead of glue to the end of the last section. Then, put it in place so that the two remaining ends meet properly. Roll the excess tape over the ends to hold everything in place. If there is any glue squeezing out of the joints, go ahead and wipe it off before it dries.
This method (with the tape) makes assembling pieces like this much easier. If you try the traditional method of nailing two sections together, then adding the next section and so on, you may end up with the last piece not fitting exactly the way you want. I have seen this happen quite often with beginners, and it is very frustrating when your projects don’t turn out the way you planned. This way, you get all the pieces aligned prior to them setting up or being permanently attached. And, if your cuts are just a tiny bit off, most of the time you can make adjustments to compensate.
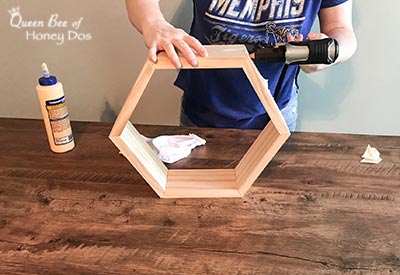
I like to add some pin nails to all of my projects that are just glue ups, but it is totally optional. Your shelves will be just as strong with only the glue. I only do it so that I can safely continue working before it has had a chance to completely dry. So, if you have a pin nailer, go ahead and add a few to each end. If not, don’t worry about it. Just allow it to dry overnight before removing the tape. (FYI – if you are interested in purchasing a pin nailer, this Porter* is good and budget friendly option).
How To Build and Hang Honeycomb Shelves – Hanging…
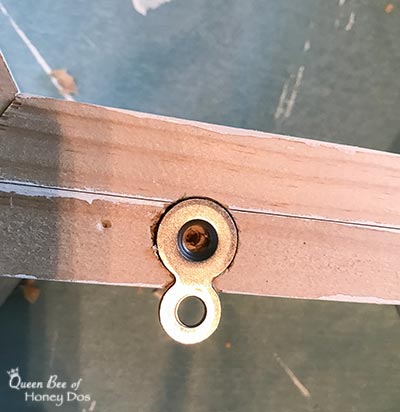
Getting honeycomb shelves mounted on the wall is something that I notice a lot of people have issues with. You want the shelves to stay flush against the wall, so that makes normal hanging hardware problematic. You also don’t want to have a lot of exposed hardware. My solution is to use figure 8 fasteners.* These are typically used during table or desk manufacturing, but they lend themselves to a lot of other tricky situations as well.
The way that these are attached is that the large side gets recessed into the shelf, and the remaining side is used to screw into the wall. Each screw hole also is recessed. This means that not only will the fastener not protrude out, neither will the screw that you use to attach them. I placed mine so that the fasteners face up on the top shelves, but you can turn them so that the wall screw is inside the the shelf opening, as well.

Final Comments…
Well, I hope that my method has explained how to build and hang honeycomb shelves in an easy to follow format. As you can see, there are no visible hanging hardware exposed on my shelves. (Well, not unless you stand on a ladder and look at the tops). I also shared with you my masking tape technique, which you can use to build square, triangular, or hexagon shapes with beveled joints.
This project is part of my home office and studio makeover. You can see the the ladder shelf transformation here, or get my professional painting tips here.

– PIN IT –

– PIN IT –


Jerica Page says
How did you then attach each hexagon to eachother? Did you just use glue?
Rachel Lynn says
Great question! You can get away with just using glue and clamping everything in place overnight. I added one wood screw to each connecting side just for extra support. Screws were placed on the least obvious side and then puttied and painted over.
Lizette says
Hello. Thanks for sharing the instructions!! They are great. One question. How did you make the figure 8 fastener recessed? I would love to make them for my sons room.
Thanks in advance!!
Rachel Lynn says
Hi Jerica! To recess the hangers, I used a drill bit the same circumference as the small side of the figure eight and drilled down to the same depth.
Margaret says
I love your video! I am going to try to make these for my future DIL’s Bee themed bridal shower to hold cupcakes! Wish me luck!
Rachel Lynn says
Good luck! And congrats on adding a new member to your family!
Micalah says
Hello, what is the final dimensions of each honeycomb when complete?