Have you ever wondered how to flock a pre-lit Christmas tree? My pre-lit tree has been with me for 10 years, now. It has been stuffed and crammed and bent in all sorts of ways throughout that time, and the only wear and tear that it has displayed has been the burning out of the lights.
(This post may contain affiliate links (*). That means that I make a small commission from sales that result through these links, at no additional cost to you. You can read my full disclosure here.)
After a while, you just want something new and fresh. So, instead of spending several hundreds of dollars to purchase a new tree, I decided to breathe new life into mine by flocking it. But I did not want to have cheap results that would fall off. I wanted to use the stuff that the professionals use.
A few years ago, I decided to restring my tree lights because so many of the original lights had burned out, and I was so tired of struggling each year to keep all the strands lit. That worked out quite well, so I thought why not try flocking it this year.

Materials Used for this Project…
- Peak Snow’s Sno-bond Flock*
- Extra Tree Stands (optional)
- Plastic*
- Water Bottle
- Strainer
- dust mask*
How to Flock a Pre-Lit Christmas Tree – Research…

First, I did my research. I looked at how other DIYers had flocked their trees – the techniques they used and any tips they had to offer. Then, I checked into how the trees in the store are flocked – tools and flock that is used.
All this led me to purchase Peak Season’s Sno-Bond flock.* It is super white and also flame retardant. And, it is the exact same flock used by the professional tree flockers – assuming that is the title they go by.
The instructions state that the flock needs to be thoroughly saturated with water to activate the glue. It also says that a final misting is needed to create that crust that keeps everything in place. Any particles that fail to soak up water will eventually fall away. Keep that in mind for later.
How to Flock a Pre-Lit Christmas Tree – Other Considerations…

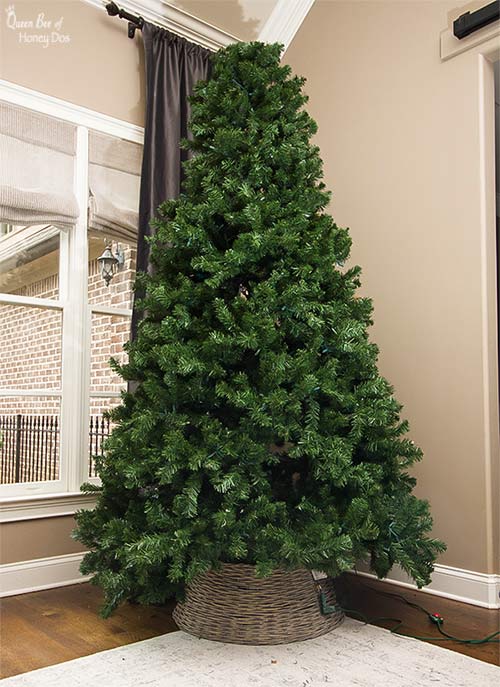
Okay, this is my tree before the flocking. It is a nine-foot Vienna Pine and it breaks down into five sections. That’s great for me because I can flock each section separately and I don’t have to stand on a ladder to do it.
It’s bad because I need to either find a way to prop each section up or wait for each piece to dry before moving on to the next. Since daylight disappears fast this time of year, and because I didn’t want this to be a multi-day project, I decided to pick up a few extra tree stands to hold all my sections. However, those are optional, and completely unnecessary unless your tree comes in sections.
How to Flock a Pre-Lit Christmas Tree – Prepping…
Next, I laid out a sheet of painters plastic to cover the floor of my garage. I thought about using a tarp or my canvas drop cloth, but I ended up having to toss the ground cover that I used in the trash. So, I am glad that I went with the cheap plastic.
After my area was prepped, I started moving each individual section of my tree out to the garage. My tree is nine feet tall, so it breaks down into five sections. To make things easier, I used the tree stands that I had picked up so that I could work on several sections at one time.
However, to make thing cheaper, you can choose to work with what you have or find some other way to prop up your sections. And of course, if you have a single unit tree, you don’t need to worry about it.
How to Flock a Pre-Lit Christmas Tree – Flocking…
You can watch the video to see in person instructions or keep reading for just the text. (I recommend doing both). I almost didn’t add this video to my Youtube channel because I was just recovering from the flu during the taping, and I am really strung out on medication. However, we all go to work when we don’t feel like, right?
Not Quite Right…
Well, obviously I don’t have a blower to blow the flock onto the tree. So, I decided to start with the most common method that I found other DIYers using. I spritzed the entire section with a generous mist of water from my water bottle.
After it was all nice and wet (but not dripping), I started sifting the flock with my fine metal strainer. Actually, I should say that I TRIED sifting the flock because the amount of flock that fell from the metal sifter was nothing like snow falling. It was more like flurries.
Now, imagine trying to get your ground covered with flurries. It is going to take a loooooong time. That is what it was like with the first sifter that I tried. Plus, most of the tips that I read, said to spray and sift at the same time. Well, I don’t have that kind of time or patience.
Almost Got It…
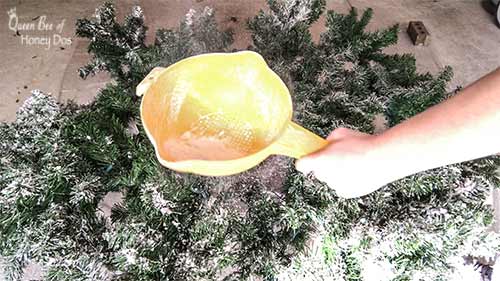
So, I moved on to my plastic strainer. It has bigger holes and allowed a heavier amount of flurries. Okay, this was much better, but still not moving along at a fast enough pace. I needed to give each section a few hours to dry before moving them, and since I hade several sections to do before nightfall, time was of paramount.
Pay Dirt!…

Finally, I decided to try hand tossing the flock. YES! Now, we were finally getting somewhere. Surprisingly, this produced more accurate results. If you have ever seen a real tree covered in snow, you know that it doesn’t look like sifted sugar. It looks more like fine particles in some areas with larger flakes in others.
My final test ended with some hand tossing followed by some sifting with the plastic strainer. I also stopped frequently to apply more water to the areas as I flocked them. The trick that worked best for me was
- start with a wet surface
- apply a layer of flock
- mist with more water
- add another layer of flock
- top off with a misting of water
How to Flock a Pre-Lit Christmas Tree – Drying…

Once the tree sections looked the way that I wanted, I left them to dry. The drying takes several hours, so make sure that you give yourself enough time.
After I felt reasonably sure that the sections had dried, I began moving them back into the house. They went straight from the garage to the tree stand inside. I assembled each section as it dried. Then, I left the tree alone for a full 24 hrs.
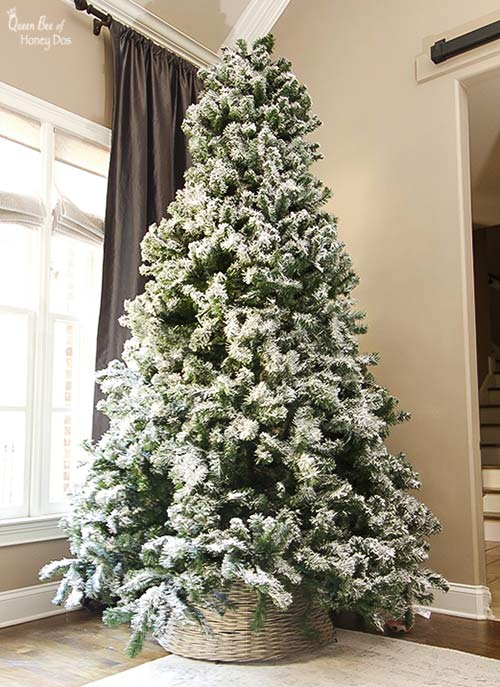
My final results ended with a nice solid flocking. I did have some of the loose flock fall away when I moved the sections, but most of it held in place very well. I also didn’t apply as much flock as some of the heavier trees.
You should expect that some of the flock will fall away if you do it manually. There just isn’t a way to get all of the flock saturated without a blower, but once the loose particles fall away, the tree should be very stable.
How to Flock a Pre-Lit Christmas Tree – Now, About Those Lights…

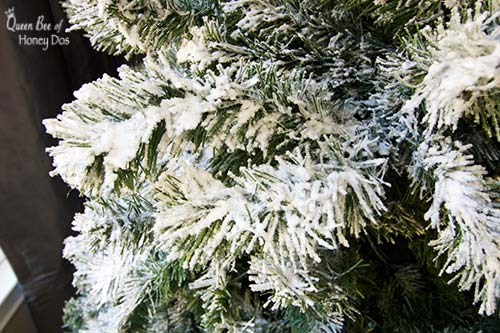
As you can see, the flock is quite thick in some spots, and because my tree had lights on it before I applied the flock, I worried that they would be covered. However, that wasn’t nearly the problem that I expected. Pre-lit trees tend to have the lights wrapped closely to the stem, and they are wound all the way from the tips to the interior of the tree stems.
I applied my flock heavily to the tips and lighter to the interior (just like it would be in nature). That avoided most of the lights. I also checked each section after flocking it to see if any bulbs were covered. When I happened across one, I just wiped it away with a tissue or with my fingers.
You can see how my tree turned out with decorations added in my Southern Home Christmas Tour. It turned out quite lovely and I am very pleased!

– PIN IT –

– PIN IT –


Please keep it clean. Comments that do not follow the Comment's Policy may be removed.