How many times have you wished for extra storage shelves for all of those occasionally used items? Maybe you don’t know where to begin. Maybe you know what you want, but you don’t have a helping hand to assist you. Well, today I am going to show you how to build garage storage shelves all by yourself!
(This post may contain affiliate links (*). That means that I make a small commission from sales that result through these links, at no additional cost to you. You can read my full disclosure here.)
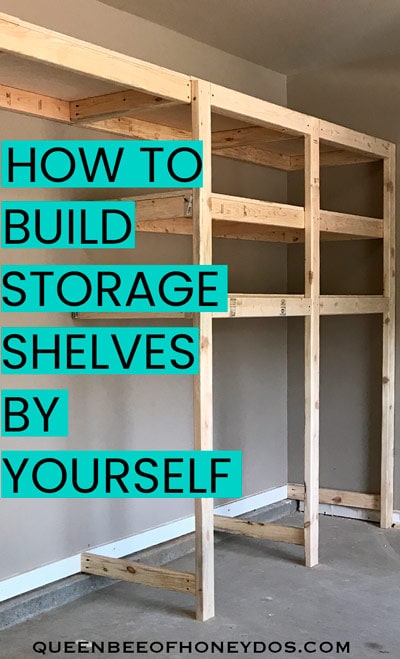
That’s right! I said you can build garage storage shelves “all by yourself.” It’s always nice to have someone help with a project this big, but you don’t need them. I build all sorts of stuff without one single extra hand, and I am confident that you can do it, too.
One of the best lessons that I received from my very talented grandfather was to think outside of the box. Things that you believe are impossible can be made possible with a bit of creative thinking. This has come in handy with large construction projects that would normally take several people.
To date, I have constructed walls, pergolas, swing-set towers, and sheds without help from anyone. Most of that was done by using lots of temporary support braces and sometimes constructing in a different order than is standard. But, the easiest technique that I use was handed down to me by my grandfather when I was 14 years old and helping to construct some storage shelves in an old shed.
I call it cloning, but I have seen it on other sites referred to in other terms. It is not a new technique. It has been around probably since the dawn of tools. You may even have even seen something very similar to this on some of the other popular woodworking blogs, like Ana White, who also used the Kreg pocket jig for her shelves.
However, the one difference between what I am doing and what the others have done is that I am doing it alone. I am sure they could have done their builds by themselves, too, if necessary. But, as far as I know, no one has demonstrated how to accomplish this particular process without assistance. Since I work alone, I have the opportunity to share this with you.
Plus, this is so much easier and quicker than building cabinet boxes and installing them. But, I will get the same effect in the end.
Preview My Most Recent Videos
How To Build Garage Storage Shelves
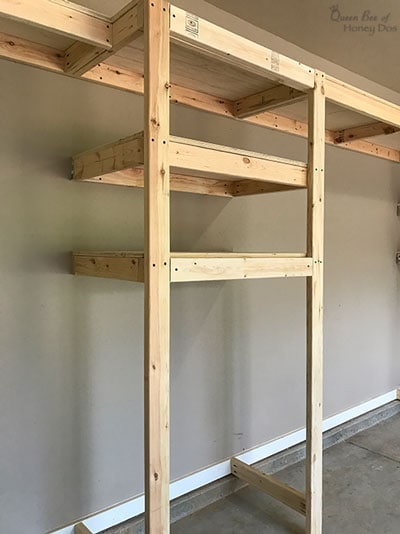
Materials and Tools:
- 2x4 lumber (amount may vary)
- 3/4″ plywood
- Kreg K4 or K5 pocket hole jig*
- 2 1/2″ pocket hole screws*
- 48″ level
- driver
- saw (it will be easier if you have a powered saw, but a hand saw and some help from the people at the big box store will suffice).
You can probably get away with using the Kreg R3 jig if that is what you already have, but this is such a large project that I find the K4 or K5 jigs are much quicker and easier on the hands with something this large.
Planning the Layout to Build Garage Storage Shelves
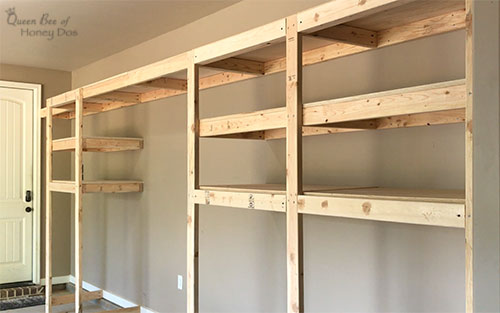
If you can create your layout to fall at exactly 8′ sections, you can purchase precut plywood that fits and avoid needing to make your own cuts. I recommend that you still use or cut the plywood section to 48″ in length because full 8′ lengths are very difficult to maneuver into place, especially if you are working alone.
On my particular layout, I wanted to space things so that my workbench (coming soon) will be centered. I also needed to leave adequate space between the door area and where the first cabinet began. As a result, my shelves required cuts that didn’t fit the even 8′ standard length.
You will also need to think about how deep you want your shelves. I wanted mine to be 24″ deep. However, you should check to make sure that your car can fit comfortably with the loss of space that you plan to take.
If you are able to dedicate a full 24″ depth, you can probably purchase 48″ x 24″ plywood and use it as is. I know this is important for those who either do not have a vehicle to transport large sheets and for those who don’t have access to a power saw.
In addition, you should take into consideration any obstacles. In my situation, I can comfortably add 24″ cabinets across the entire wall except for the area near the door. It is set back closer to the wall. So, I needed to make some adjustments.
To compensate for that door, I decided to end the shelving before it was close enough to interfer with the entrance . I will be adding a setback storage space in the empty space next to the door (also coming soon). This area will soon become a mudroom type area and will house a bench and some sort of wall storage.
This is just the first part of this entire garage makeover. It will be an extensive and complete overhaul that is as budget-friendly as I can possibly make it. If you are signed up for my newsletter, I promise I will notify you once each addition is complete.
Getting Started
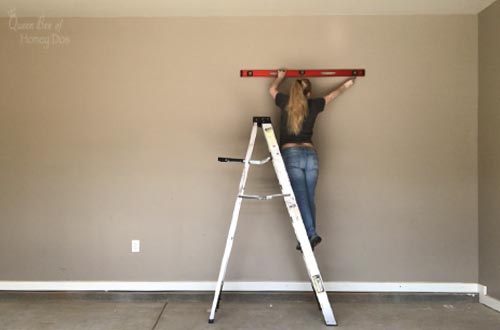
Before I placed the first screw into the wall, I first laid out guidelines. Doing this is very helpful when you are working alone because, as you know, it is difficult to make accurate judgments when you are up close on a wall. I used my level to make sure that I was getting my guidelines evenly spaced and level.
Because I want to be able to place storage containers on the top shelf, I placed the first guide mark at a minimum of the depth of my containers with a few inches added on for wiggle room. Using that first mark, I continued to transfer guide marks at the same interval down the wall.
If you watch the video below, you will notice that I did not carry my guides all the way down to the floor. This is because I am using the bottom half as roll-in storage bays. This will allow me to roll my portable worktables into the bays, but it could also work for garbage can storage. If you have no need for this type of storage, you can continue adding shelves all the way to floor.
Making the Cuts
When I got ready to build my garage shelves, I decided to do it in an assembly line method. In other words, I made all of my cuts to the 2x4s first. Then, I drilled all of the pocket hole screws, then I cut all of the plywood panels. Once I had all of the parts ready to go, the actual assembly moved along pretty fast.
I have found that doing builds this way helps to speed things along. I also like it because I have a tendency to get bored with projects after a few days. This way, all of the boring work gets done first, and by the time I am losing interest, I get to start on the exciting part.
Note – if you are doing 8′ sections, make sure that you check those 2x4s. Don’t rely on the lengths as they come. They often are not precise and even if they are, you should still square up the ends to make sure that everything is as perfect as possible. (This is extremely important if you plan to move onto enclosing these as I did in part 2 of this build).
For the support braces, I cut mine to 21″. This is the measurement that you will need if you are making your shelves 24″ deep. (not including the legs) You will need to cut one support for each end of the shelves. Plus, you will need one placed at intervals for support. I recommend that you place a support at least every 48″ of length and more if you plan to place heavy objects on them.
Assembly to Build Garage Storage Shelves
Watch it now, or read it below! I recommend doing both if you want to build your own garage storage shelves. You can subscribe to my Youtube channel to catch all of my video builds and DIYs.
Step 1
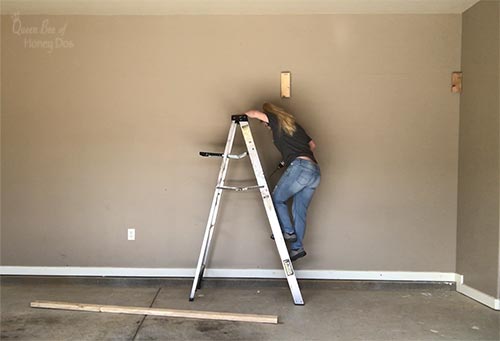
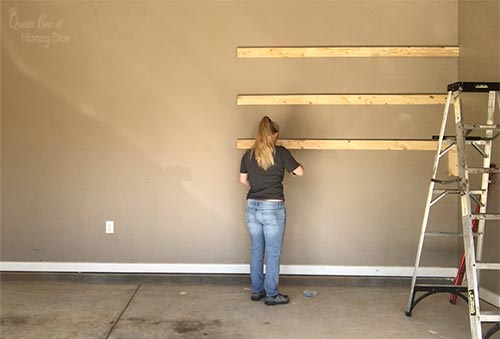
Because I was working alone, I needed to create a second set of hands. To do that, I just cut a few small pieces from a 2x4 to use as a temporary ledge on which I could rest my support boards. I attached one of these temporary ledges to the wall where each end of a 2x4 would rest. I lined each temporary ledge up with the guidelines that I had laid out previously.
Step 2
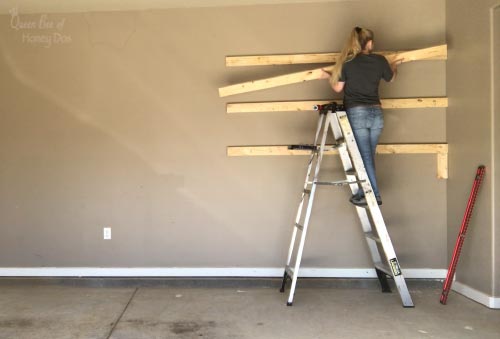
After all of the wall supports were attached, I then began to clone them. To do that, I just attached a second 2x4 over the top of the ones attached to the wall. A level is not necessary for this step, but you should visually make sure that the tops of each 2x4 lines up with the one it is attached to.
Since this connection is temporary, I only used one screw at each end. I also did not screw it all way through, but instead just made sure that it was in enough to hold everything properly.
Step 3
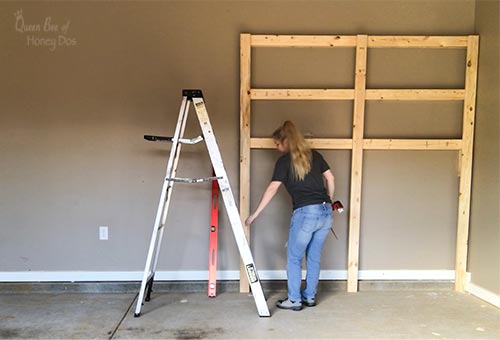
After I had finished doubling up on the horizontal 2x4s, I then attached the legs to the cloned boards in step 2. Make sure to use your level to ensure that they are straight and have even spacing between each other. If your floor has a slope to it, each leg will need to be measured and cut individually.
FYI – Yes, some of these images look a little wonky. Your eyes are not deceiving you. I have taken some from the video so the camera angle makes them look slightly crooked. Plus, the sun was reflecting off of my automobile at times throughout the day. [sigh… ] Oh, to have a perfect recording studio.
Step 4
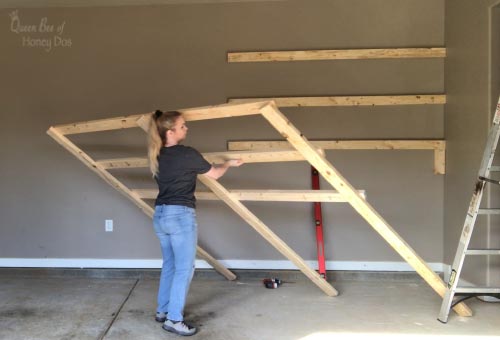
Once the front of the shelves were cloned, I then removed those temporary screws from step 2 and carefully laid the entire shelf front on the floor.
You can get a good idea about the size of the shelves in reference to my size from this image. As you can see, it is perfectly doable even for petite women.
Step 5
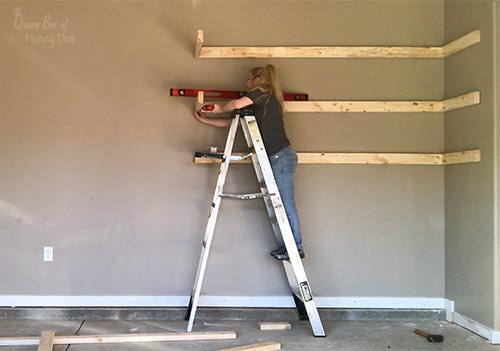
Next, I began connecting all of the center supports. Start by connecting the end supports and use your level to make sure that they are going in level. Don’t tighten these down all the way, yet. You will need to be able to have a tiny bit of flexibility when you replace the front of the shelf.
Step 6
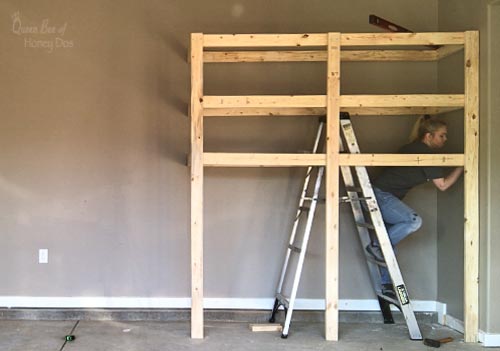
After each end support was in place, I raised the front section back up and aligned everything with the supports. You may need a few clamps at this point, but I was able to hold the front in place until I had a few screws in to hold it for me.
Use the level to make sure that the supports are staying level. Make adjustments as needed. Then, once the supports are attached to the front, the screws can be tightened down.
Step 7
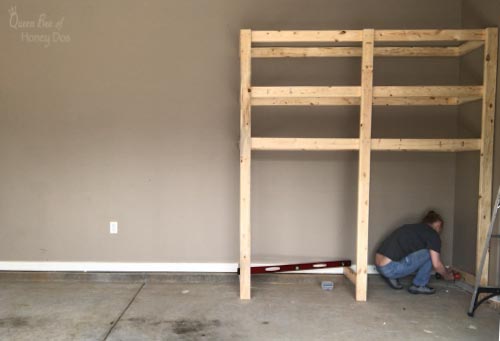
Place center supports at intervals where the plywood sections will meet. For instance, if you have an 8′ shelf and are using 48″ plywood sections, make sure there is a support at the 48″ mark. This way, the plywood will have support on all four sides.
You can add additional supports as needed to the interior. If you will be placing a lot of heavyweight items on your shelves, you may need supports located every 24″ rather than every 48″. When in doubt, add support. Just for reference, walls and floor joist are placed at 16″ intervals. So, you should not need anything closer than that.
Step 8
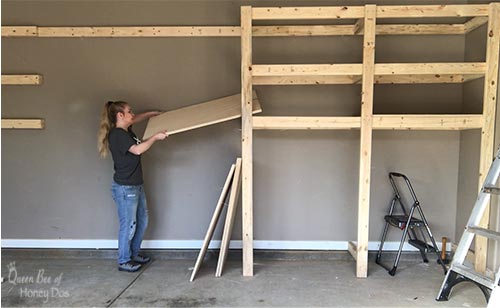
Finally, the frame is ready for the plywood shelves. Slide those in place and attach them with a nail gun or some wood screws.
Final Comments
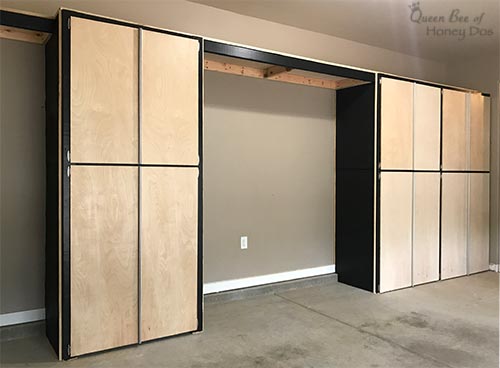
Fast forward to a couple of months later and I have enclosed these shelves. If you want to see how to turn your garage shelves into a fully enclosed cabinet system, be sure to check out part two of this 5 part build! (coming next week) And if you liked this project, please spread the word by sharing it on your Facebook or Pinterest pages.


Gordy says
Great idea and the instructions make it look easy. Thanks
Rachel Lynn says
Thank you! Oh, and your welcome. ?
Lori says
The idea of doing this myself was a little scary. You had clear instructions on this project so I am going to take it on
Thanks
Rachel Lynn says
I have no doubt that you will do fine. Good Luck!
Emil says
Very nice and very clear instructions. I have to adapt this to my garage. Thank you for posting this.
Rachel Lynn says
You’re welcome. Good luck!
mike says
what are your shelf heights ? do you have a plan drawing that you could share
Rachel Lynn says
I don’t have a plan for this. I was winging it as I went. But I am sharing the entire garage makeover on my Youtube channel. Once it is all said and done, I may just go back and add the layout. I believe the shelves were 18″ deep. I set them to fit the container size that I like to use. The top shelf has a few additional inches of wiggle room from the ceiling.
Anonymous says
What is the length between the floor and the first level of shelves?
Also, the vertical 2 by 4 have been used at full length i.e. 96″?
Rachel Lynn says
From the bottom of the 2×4 that serves as the face frame for the top door to the floor is 52″ on mine. The vertical (legs) would be cut to match the height of your top horizontal board. This will vary from person to person based on how much room they need for the top shelf.
Brian Janiuk says
Great instructions. The video made all the instructions very clear. Hopefully this spring (once it warms up) I will be doing something very similar. Thanks again.
Noman says
Do u have any plans or cut sheets ?
Rick Hamlet says
Enjoyed the video and instructions. However, one potential consideration if the shelving is going into a garage is the pitch of the floor leading to the entrance. Unfortunately this issue bit me when installing a workbench and I had to make a mid-course correction. By cloning the second side from the first, you are making the lengths of the vertical members the same. Sometimes to allow drainage of anything that gets spilled inside the garage, the concrete is poured with an ever-so-slight pitch toward the door. Keeping your shelves level, if you don’t consider this pitch, the vertical members will end up being too short.
Kristin says
Ok I’ve looked up several how-tos on this and can’t wrap my brain around why, in all these even #s are the cleats 21” – can you please explain? Thank you!