Tabletop Build
As promised, I am demonstrating how I made the cedar top for my DIY Island last week. This particular tabletop build is done using 6″ construction grade cedar planks. Now if you know anything about cedar, you know that the construction grade lumber is quite rough, and it may seem like an unusual choice for a DIY tabletop. However, it actually makes a beautiful rustic piece when done properly. In fact, if you try it, you may never want to use standard pine (most DIYer’s wood of choice) again.
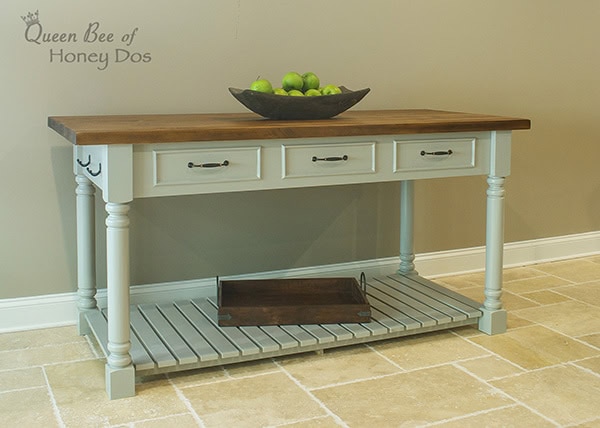
Just to refresh your memory, or clarify if you didn’t see the DIY Island post, this is the piece in its entirety. The finished measurements for this are approximately 6′ x 3′ x 36″ high.
And an up-close view of the finished tabletop and the wood grain. I intentionally allowed the light to reflect upon the grain so that you could see how level the top is and how tight the seams are. With the exception of the very light edge on the center-left board, (which gives that attachment location away) it is very hard to determine where the boards are glued together unless you look at the ends.
A Bit About Using Pocket Holes for Table Tops…
If you are very familiar with me, you would know that I am a BIG fan of the Kreg Pocket Hole Jigs. So, you may be wondering why I am using glue for the construction of this tabletop instead of the pocket hole jigs. Well, let me explain to anyone that is new to furniture construction.
I do not recommend using pocket holes for any tabletop that is intended to be/stay completely flat and tight. (i.e. you want the surface to be crack free). Although I love using pocket holes for quick and easy assembly, they can and will cause a table such as this problems.
First of all, because the screws are pulling on the bottom edge of the boards, eventually the boards will begin to pull in that direction. Sure, you can clamp everything down in order to get an initial tight fit, but eventually, any board that is this thick and wide will present with this problem.
Additionally, in any top this large, I like to build to allow for natural movement. It needs to be able to expand and contract, and pocket hole screws will restrict that to some degree. But other than that, I am still a big Kreg fan.
MATERIALS Used for this Project…
- (6) 6″x6′ cedar lumber. (I spent about 30 minutes digging through the wood at the store looking for the perfect pieces. You want to find wood that is straight, unbowed, and relatively knot-free).
- Titebond Premium wood glue
- (4) pieces of 1″x2″ strips cut to 28″ long
- package of Figure 8 Tabletop fasteners
- Helmsman’s Spar Urethane in Gloss
- Paint thinner
- 4 in 1 Wood filler (wood putty can be used instead)
- stain (I used Minwax in Provincial)
Tools Used for this Project…
- Pipe Clamps (I used 5)
- (4) Bar clamps or other types of clamps
- (2) pieces of 2×4 (to use as caul clamp – more about this below)
- Orbital Sander
- Table Saw (you may be able to bypass this step if your boards are straight enough)
- Miter saw or Circular saw (Or just have the store cut the wood for you)
- drill/screwdriver
- bits (3/4 or 1/2, depending on which side of the fasteners you prefer to drill for – I used 3/4)
- #8 wood screws (1″)
- 1 1/2 ” wood screws (to attach the support strips)
- tack cloths
- lint-free cloths
- fine-grit sanding block
Now Onto the Table Top Build…..
The first thing that you will want to do is to do a mock-up of how you want the boards to lay. Since I prefer to split my table into two halves, I am doing my mockups in the same fashion. (Splitting it up takes a few extra days for glue-up, but it allows me to work in smaller sections. That makes it seem less time consuming because I get finished with the sections rather quickly and don’t feel rushed. But if you want, just do the whole table at once).
This mock-up can take a bit of time, because you may want to play around with the boards to see which ones fit together better for both fit and aesthetics. So, just take your time. You’ll notice that I have marked the ends to indicate where I want to trim off some excess.
One other thing that I would like to point out if at all possible try to have the grain of the wood swap direction with each board. You can see by the ends of my boards that the grain in the first board is going up and to the right of the image, the second board’s grain is going down and to the left, and the third board’s grain is up to the right. Doing this will help later when the boards expand and contract.
How to JOINT Boards on a Table Saw…
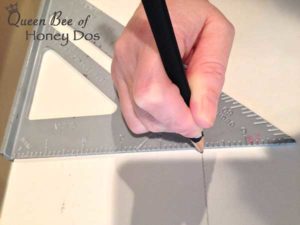
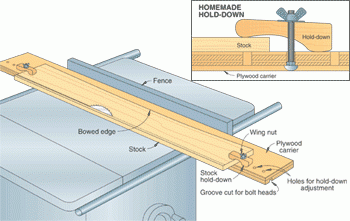
What I do is as follows: Take a board that already has a perfectly straight edge (such as this melamine board) and is wider than the material that needs to be cut. Then, I use a square to mark a straight line from one side that is just a bit less wide than the wood to be cut (for example, I am making a straight line that is 5″ from the edge, and the cedar boards are almost 6″ wide).

After I run this through the table saw, I will have one perfectly straight edge on my cedar board. Which, I can then use against the fence to get a straight edge on the opposite side. (FYI – I just removed the very minimum needed to get a smooth edge)
Now Back to the Table Top Build…
Once I have everything ready to go, I glue all the boards together (again, I am just working on one half of the table). Make sure that you get a nice even coat of glue on each edge. Then, clamp everything in place.
These clamps are called pipe clamps. They are probably the cheapest clamps that you can get for the money. You add a pipe to these clamps, and you can make them as big or as small as you need. Plus, they work extremely well for glue-ups.
I used 5 of these on my project. (Found here on Amazon – FYI this is an affiliate link) They need to be rotated down the length of the boards with one on top, one on the bottom, one on top, etc. This will ensure that equal pressure is delivered.
At both ends of the tabletop, I attach two 2x4s using two bar clamps. This method is called a caul clamp, and its purpose is to force the tabletop to stay level. (Please pardon all of the tags. I am notorious for never removing them).
Once everything is clamped up, leave it to dry overnight. Then unclamp everything and get busy sanding. If you have a dust bag that attaches to your sander, clean it out, and use it to collect the cedar dust. (I’ll explain why in a bit).
I spent about 30 minutes sanding each section. I also sanded the bottom, but not quite as thoroughly. You just want to make sure that the bottom does not have any splinters or rough areas.
If you are splitting your tabletop into two sections as I did, repeat the glue-up process for the second half. Then, do a final glue-up for the two finished sections.
At this time, I added 1×2 support strips to the bottom of the tabletop. This is just temporary and unnecessary. I just do this until I have the tabletop attached to its base. Then I remove them.
If you want to leave these in place, you will need to use expansion washers and route out a slot for the screws. Otherwise, the wood movement will cause problems for the top once it starts expanding.
This is also a good time to try out a few stains. You can see that I tested several stains on the bottom of my table. This is the best way to see how things will look if you don’t have any extra wood. After you finish, test the tabletop fit on whatever surface it will be used.
Seam Touch Ups For the Table Top Build…
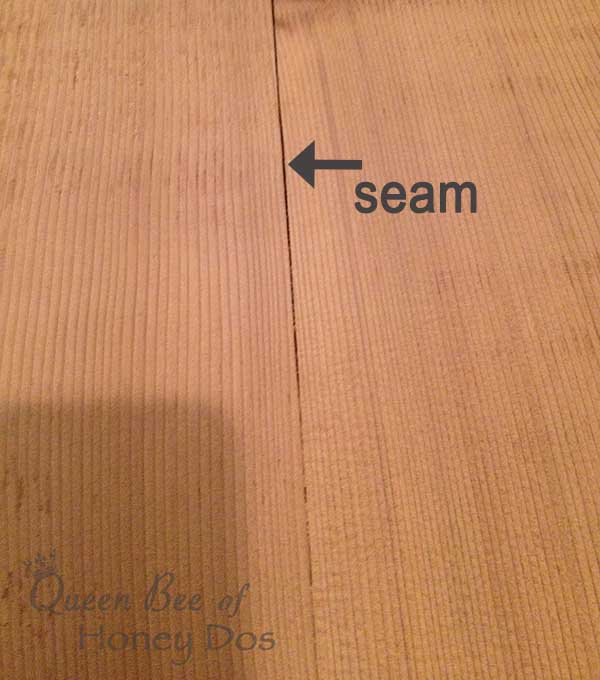
Okay. Remember how I said to save the cedar dust from the sanding. Well, this is what I like to do. (I have zoomed in on a seam where the edges did not get a super tight fit all the way through. It looks really big in this image, but in reality, it is not very wide at all. You can see that it is about the same width as the grain running through the boards. This spot is about 5″ long).
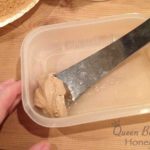
Pour the cedar dust collected in the sander’s dust bag onto a disposable plate. Collect the 4 in 1 wood filler (or wood putty) and a bowl with a small amount of water in it.
(The filler that I like to use is by TimberMate. It doubles as a filler and as putty. It comes in a variety of shades. This one is Oak and as you can see, it very closely matches the color of the cedar. If your interested in this product, it can be found here. Again, this is an affiliate link).
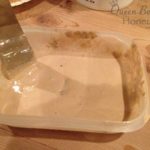
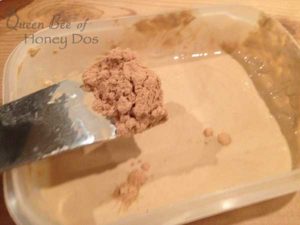
Use the mixture to fill the seam. Here is my seam filled with the mixture. The wood is still wet from the mixture, so it looks like it has a water stain. But, that will dry in a bit. (NOTE – this is best for use on very fine lines. I wouldn’t do this for anything too wide. Just for reference, anything less than half the width of a penny should be okay. More than that and it will just not look right).
I have found that filling the wood in this manner allows the stain to blend better and hides the location of the filler. But, if this all seems like a bit of overkill to you, then, by all means, do what you would normally do.
After it dries, give the tabletop one final sanding to touch up and get any missed areas.
Getting Ready to Mount the TableTop…
This is my Island that will be holding this tabletop.
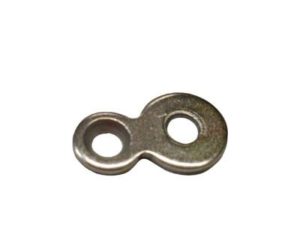
Both screw holes are recessed, one on one side and the other on the opposite side. This keeps the screws flush with the surface.
To install the figure fasteners, just drill out a recessed spot for one side to rest in the apron. (I am using the 3/4″ side on my apron, but you can turn it around and use the 1/2″ instead). The opposite side will screw into the bottom of the table. Space these about 18″ apart around the table frame, and then attach to the tabletop
Now it is time to stain the tabletop, but first, make sure to wipe down the entire surface with a tack cloth. Even if you think it is perfectly dust-free, wipe it anyway. I promise you will lift some unseen dust away.
Now, using a lint-free cloth apply the stain is smooth, long swipes following the grain. Continue working your way across the table until everything is covered. Then quickly hit the sides and ends before the stain has a chance to dry. (Allow to dry for a few hours and repeat if needed)
For my top coats, I used Helmsman’s Spar Urethane mixed with Jasco’s paint thinner. I mix it half and half and apply it with the lint-free cloths. (Note – this is fine for tabletops, but not for a butcher block top that will be used to cut or prep food directly on the surface. I have seen several DIYs out there that instruct people to use finishes that really are not safe for contact with food for butcher block tops, and I just want to specify that these finishes should not be used in that manner. Just in case someone is reading this and thinking that they will use this tutorial for a butcher block top.
Instead, for butcher block tops, you should use a food-grade sealer, such as mineral oil. If you want a dark butcher block, the correct way would be to use dark wood, such as walnut, not a stain. Sorry to be a Debbie Downer, but I wouldn’t want anyone harming their health for a pretty piece of furniture. I recommend reading my guide on appropriate materials for cutting boards and butcher block tops.
Again, apply the sealer in smooth even swipes. Make sure to maintain a wet edge as you go. Allow this to dry overnight and repeat. After both coats have dried thoroughly, lightly sand with a fine-grit sanding block. Clean the dust away with a tack cloth, and apply one final coat of the sealer.
It looks rustic and refined all at the same time. :-)
Part 1 of this project – the DIY Island – is available here.
Final Thoughts…
I hope that you enjoyed my tabletop build. If so, feel free to share it on your social media of choice.
This post has been linked up with Remodelaholic.com


Roderick says
Hi. Why do you dilute the topcoat and use it for all three coats? I thought it’s just for the first wash coat?
Is it necessary to use a sanding sealer on conditioner? I feel the blotches give more character.
I’m just starting off woodworking and I’m doing a farmhouse coffee table. i thought the top should be seamless but I see you can fill it up.
Nice work.
Thanks
Rachel Lynn says
If you like the blotchiness, by all means you can eliminate the conditioner. As far as the topcoat, diluting it will give you a much smoother finish. Undiluted coats tend to develop bubbles and can show brush marks. Each diluted coat will give a gradual build of protection that is smooth and blemish free.