I am always for upcycling or repairing things whenever I can. Sling chairs are no exception. If you have always thought this was an impossibility, check out these instructions for repairing sling chaises and/or chairs. Ripped or torn fabric is just an opportunity for a fresh new look!
I was so sad to see my favorite sling chaise die. After many, many years of good service, it finally succumbs to the relentless abuse of my two boys.
I have several other lounge chairs that I could choose for my poolside relaxing, but for some reason, I just wanted this one.
So, what more is there to do than to perform an overhaul, and this is how I repair sling chairs and chaises.

(This post may contain affiliate links (*). That means that I make a small commission from sales that result through these links, at no additional cost to you. You can read my full disclosure here.)
Material Required
- sling fabric*
- sewing machine with a leather needle* and heavyweight thread*
- measuring tape
- square*
- Flathead screwdriver
- hammer
- needle nose pliers
- other screwdriver bits, socket wrench, and pliers as needed
- clamp (optional but useful)
So, before you worry about any of these materials just let me go over some of these a bit.
Fabric…
You probably won’t find this type of fabric in your local fabric store. I wasn’t even able to get it through special orders at my favorite, and very big, fabric store. It is a specialty fabric and usually will need to be ordered online.
I bought the fabric for my first repair on eBay for about $50. That provided enough to do two chaises and two other sling chairs. So, with just two yards you should be able to easily do one chaise or two chairs.
I have since found a great selection on Amazon, including the Sunbrella brand. I am including the links above to get you to where you need to go.
Regardless of where you choose to purchase your fabric, you will want to make sure that what you are getting is “Sling Fabric.” It is made of nylon and thicker and sturdier than just about anything that you have probably worked with before.
Just any old fabric will not work. 1) Because it must be able to stand up to the elements and most fabrics will degrade over time. 2) Because it needs the strength to hold a human’s weight without sagging over time.
Sewing…
Really, all you need to be able to do is sew a basic stitch in a straight line. You don’t need mad skills for this project.
The most important thing is to have a sturdy needle. I used a leather needle, and to use heavyweight thread in polyester (or nylon if you can find it).
I would not recommend using a cotton thread, because it will degrade quickly. You can, however, use a lighter-weight thread for the bobbin if your machine will not support a heavyweight bobbin thread.
Instructions and Details…
Besides that, if you can cut a straight line with scissors, and if you can work a screwdriver (or socket wrench – depending on what type of screws are in your chair) you can repair sling chairs or chaises.
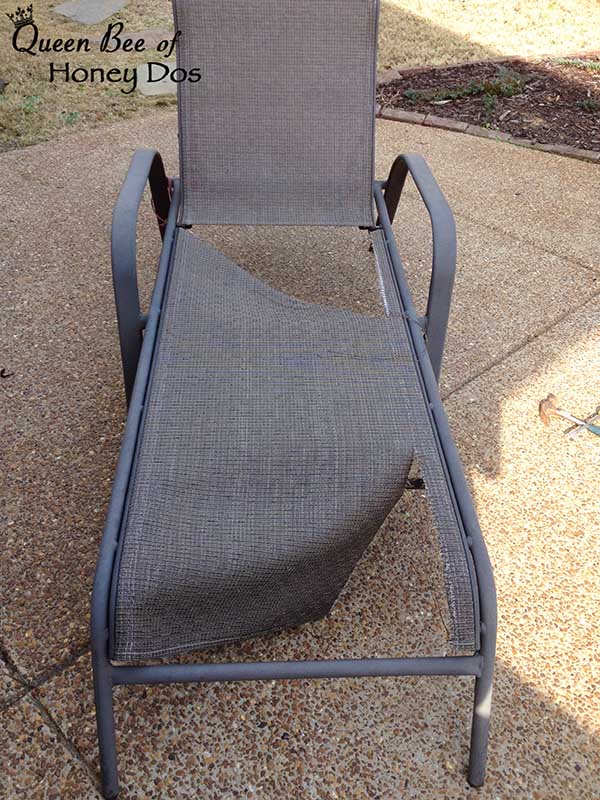
So here is a before of my pitiful-looking chaise, after one of my boys decided it was a better trampoline than a seat.
It has definitely seen better days. It was originally a chestnut-colored fabric. I am going to be replacing it with a SunSetter Sling fabric in Pecan.
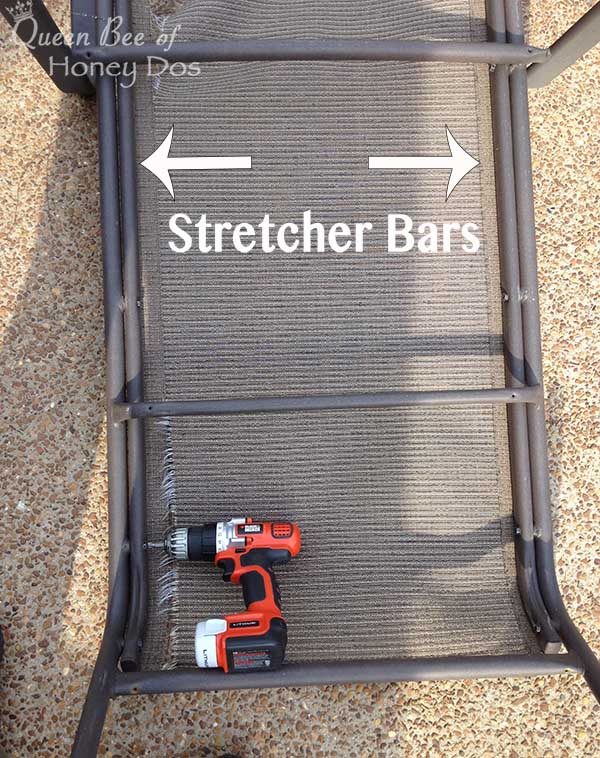
To begin, I removed the stretcher bars that hold the body section in place.
Mine were held with bolts that have Phillips’ heads, but other brands may need a socket wrench.
Once all of the bolts are removed the lower section will come completely off of the frame and this will make it easier to maneuver.
Note – If you are wanting to repair a chair instead of a chaise, you will just follow the steps for the headrest section. Chairs usually do not have divided sections like a chaise will. So, feel free to skip ahead.
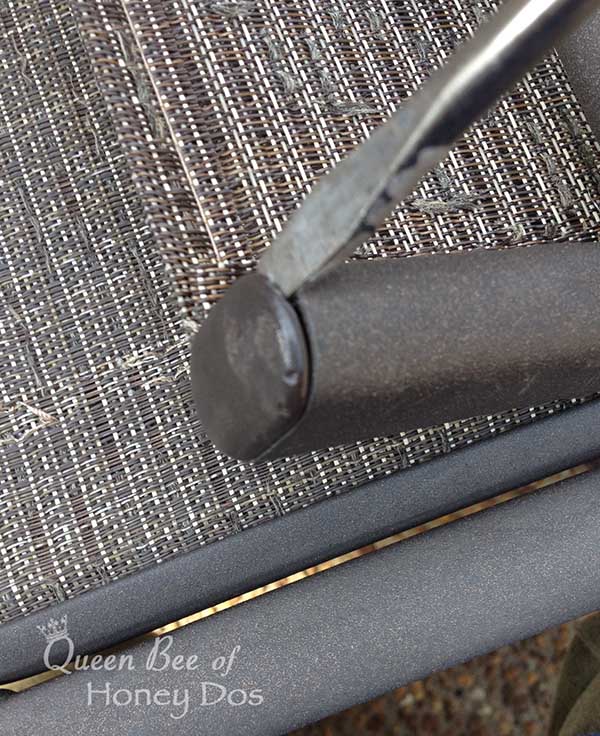
Next, I removed all of the plugs at the ends of all the bars (both on the top section and on the section that was just removed). These can be pried off with a flat head screwdriver and a hammer. Put these and all the bolts somewhere that you won’t lose them.
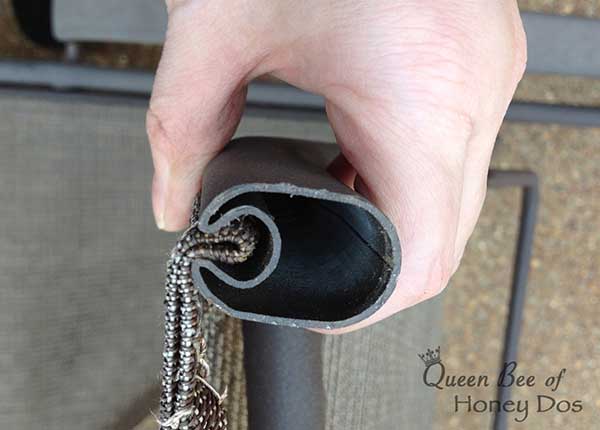
After all of the plugs are removed, you can see the track inside the stretcher bars. Although you can’t see it in this image, there is plastic tubing down inside the fabric that sits inside this track.
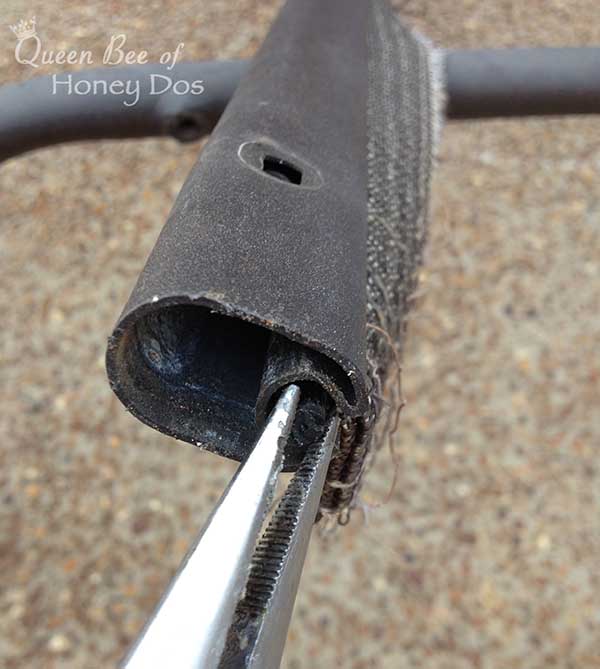
Using the needle-nose pliers, reach in and grab hold of that tubing and begin to pull it out of the fabric and the track.
You may have to tug and pull hard to get it free because it has molded itself to the curves of the stretcher bars and will not want to slide easily.
If the needle-nose pliers do not give you enough leverage, use a larger pair to yank it out all the way.
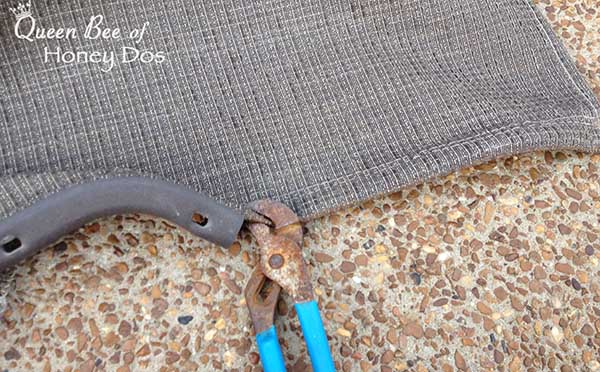
Once that is done, do the same thing with the fabric. The fabric will slide out easier than the tubing, but it may still put up some resistance.
I am using my old rusted pliers. I know they look ugly and are in serious need of some love, but they really showed the tubing and fabric who was boss.
Head Section…
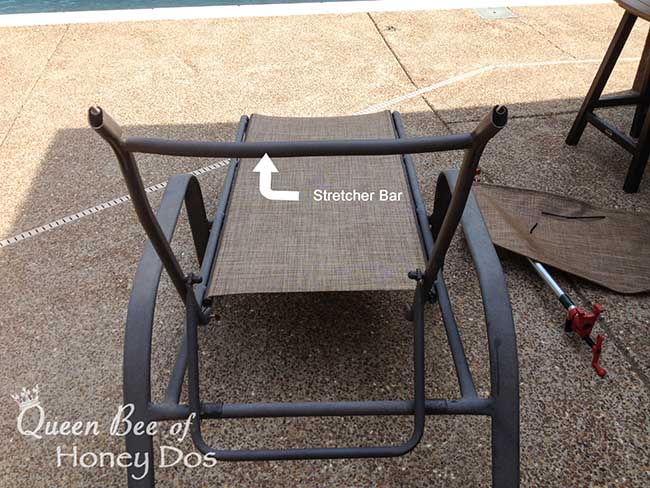
Now, you will need to repeat the steps above for the head section, with a few exceptions.
As you can see from the image above, there is a stretcher/support bar that runs across the back of this section. Unfortunately, it does not detach.
This is the same as the chairs – so pick up here if repairing a chair. If there are any bolts that connect the bottom of the head section to the frame, remove them now.
The stretcher/support bar cannot be removed on most seats, but in some chairs, you will be able to slightly and temporarily bend it enough to provide a little slack.
This is where the clamp comes in. You will need to use your clamp to push the sides of the chair closer together by just a tiny bit.
Note – only do this if you absolutely need to. First, try to remove the fabric by pulling it from the tracks with the pliers.
Place the clamps on either side of the support bar, and slowly apply pressure to loosen the fabric stretch. Just apply enough pressure to be able to pull the fabric from the track.
On my chaise, I was able to get it free without using the clamps, but I did try out the clamps after the fabric was removed.
Cutting and Sewing the Fabric…
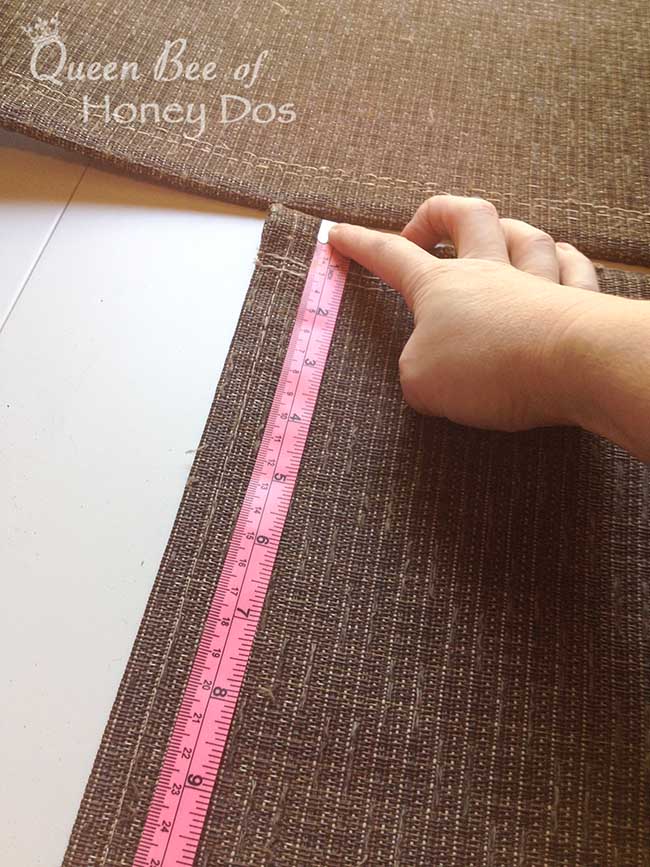
It is very important to get accurate measurements for the fabric. If you get off by an inch, either way, the fabric will either sag or worse, not go on at all.
Make sure the old fabric is stretched flat. Then, use your measuring tape to take its measurements.
To this add 1” on each side. For the head section, or if you are working on a chair, you can go all the way up to 1 1/2″ extra on each side, but only if that stretcher bar doesn’t have any give to it.
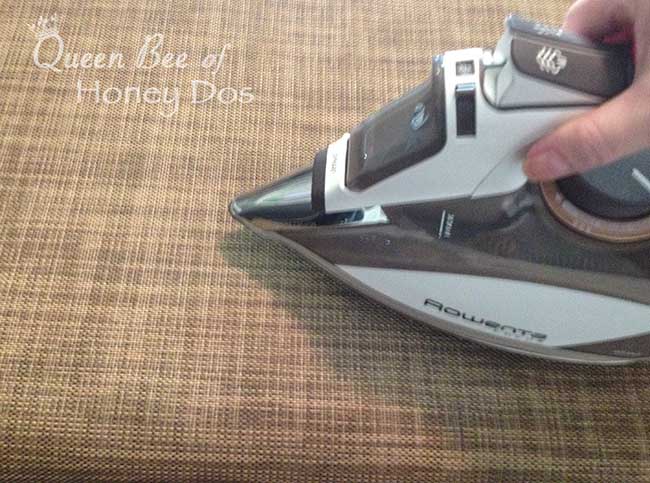
Next, before transferring the measurements to the new fabric, make sure that the new fabric is wrinkle-free. The slightest wrinkle can mess up the precise measurements that we want.
I used my iron set on the very lowest setting. Remember this fabric is nylon, and can and will melt very easily. If you are at all concerned about ruining the fabric or your iron, use a tea towel to protect both.
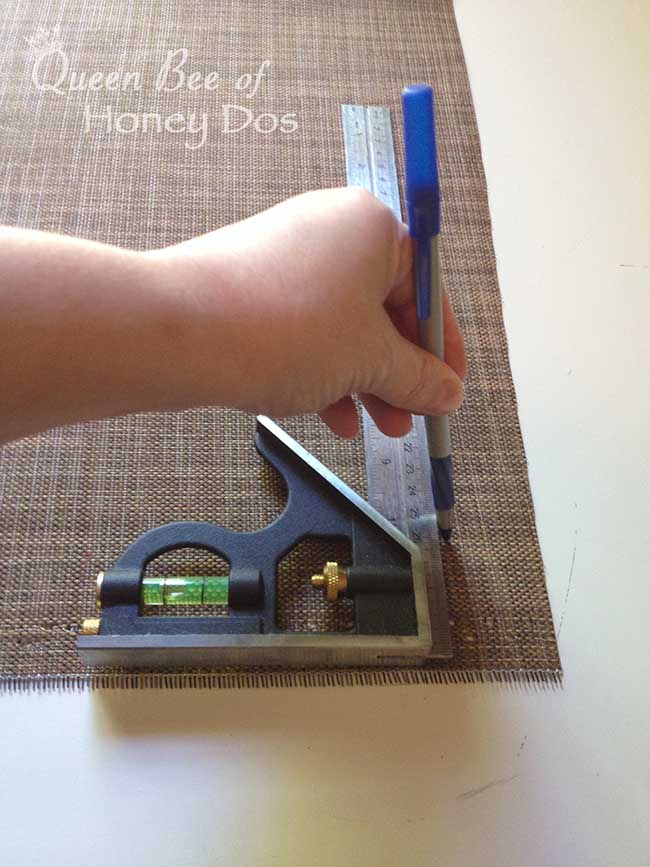
Now, let’s measure the new sections. I am using a square to make sure that the piece that I am going to cut is perfectly square.
It is best to create your own raw edges, as the ones that the fabric has will be made by whoever cut the fabric for you. They undoubtedly were not concerned with getting a perfectly straight edge for you.
Work your way around the fabric, measuring and making sure that it is square.
It is okay to use an ink pen on this fabric as long as it is not a ballpoint pen that could run when it gets wet. Just make sure that you are marking on the back of the fabric.
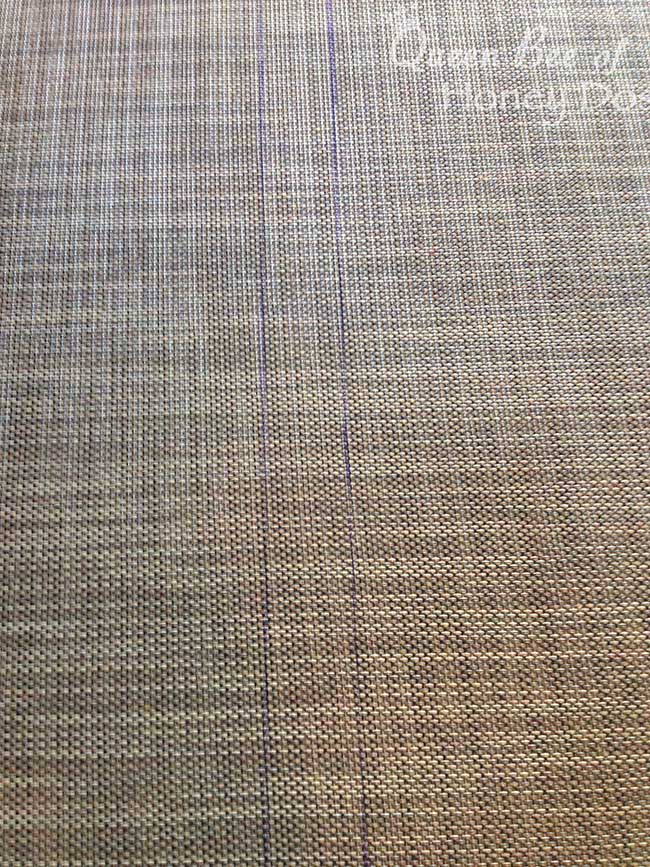
After marking all of the pattern’s measurements, go back and add a second line 1″ inside of the first.
The outside line will now be the cutting mark, and the inside line will be the fold line.
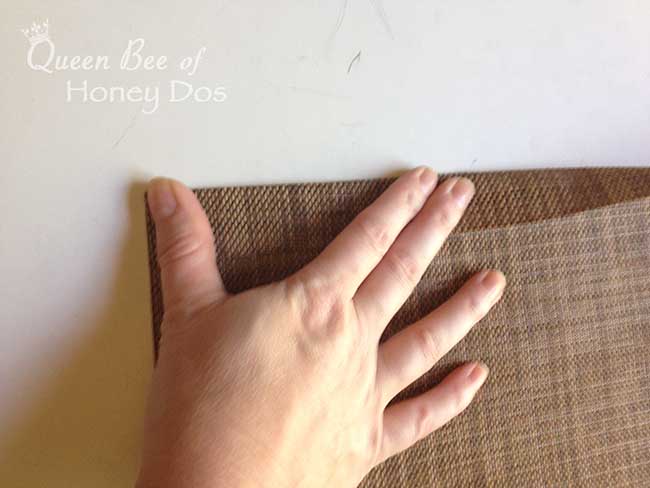
After cutting the pieces out, fold and press the fabric along the fold line. The fabric creases pretty easily. You can use the square or the flat edge of the scissors to press the crease in place.
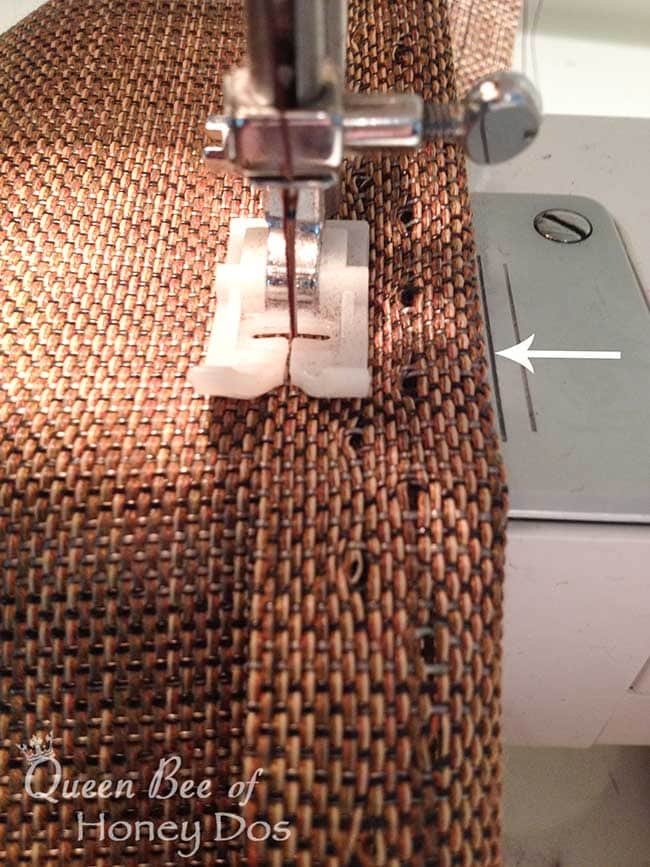
Once the creases are in place, it is time to stitch everything in place.
You will notice how I am using the guide on my machine to visually keep a straight line. If you don’t have something like this on your machine, a piece of blue tape placed on the machine can work as a guide.
You will need to run two rows of stitching over both the long and short sides of your fabric. Try to keep the spacing even and neat, because these stitches will show.
First, fold down and sew two parallel lines along the short sides of the fabric.
Don’t concern yourself with the exposed raw edge. The sling fabric will not unravel with an exposed raw edge. The most important thing is to keep a nice straight line.
Next, sew the first stitch line on the long sides of the fabric to prepare for the tubing.
Place your fabric next to whichever guideline will allow you to sew almost right on the free edge without going over it. This will leave as much room as possible for the tubing.
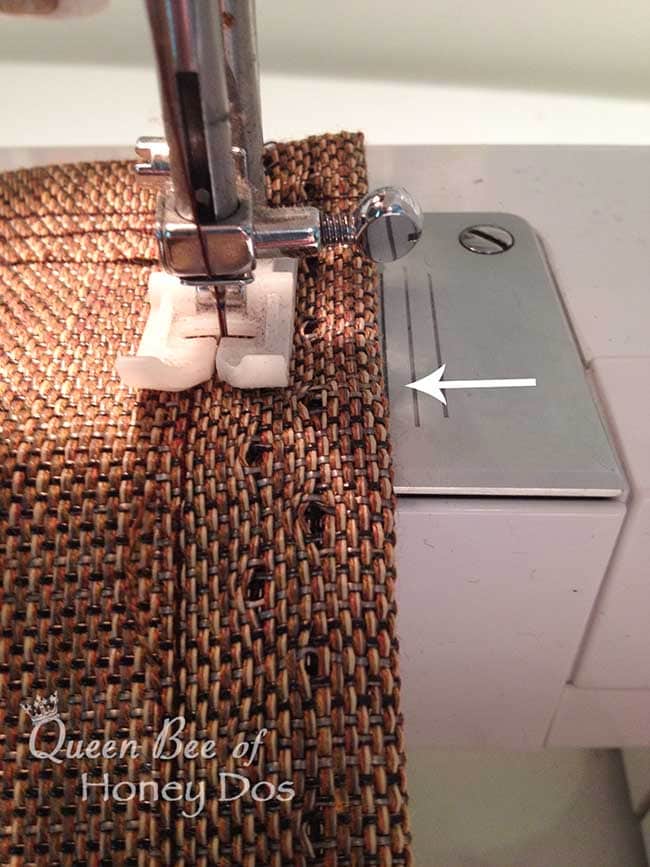
After that first stitch line is complete, shift the fabric over just a bit and do a second parallel stitch line. You will notice that I shifted just a tad over to the next guideline.
You have to make sure that there is enough space to slide that tubing back in, so just consider that when stitching your lines.
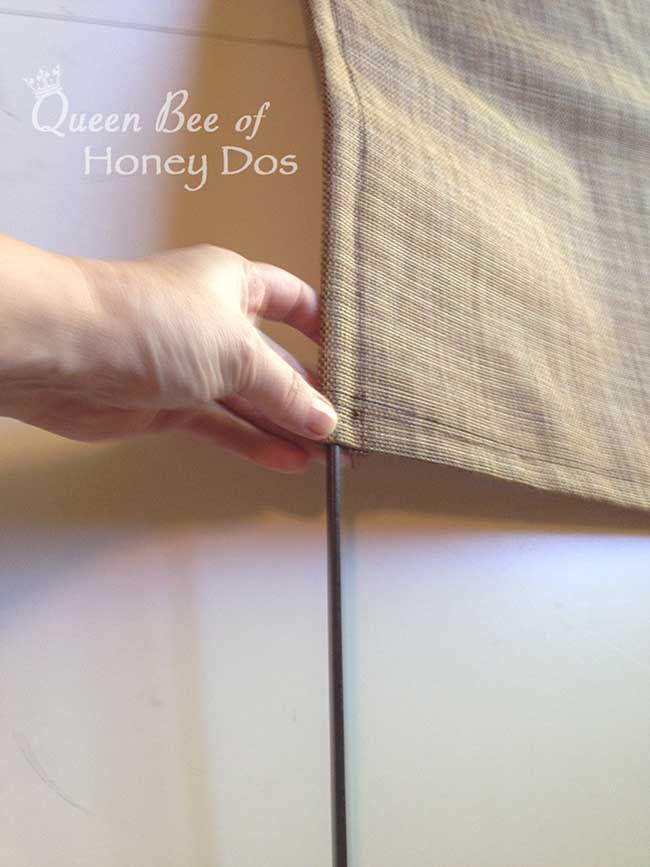
Now, we can start putting everything back together. Start by inserting the tubing back into the new channels that you just made.
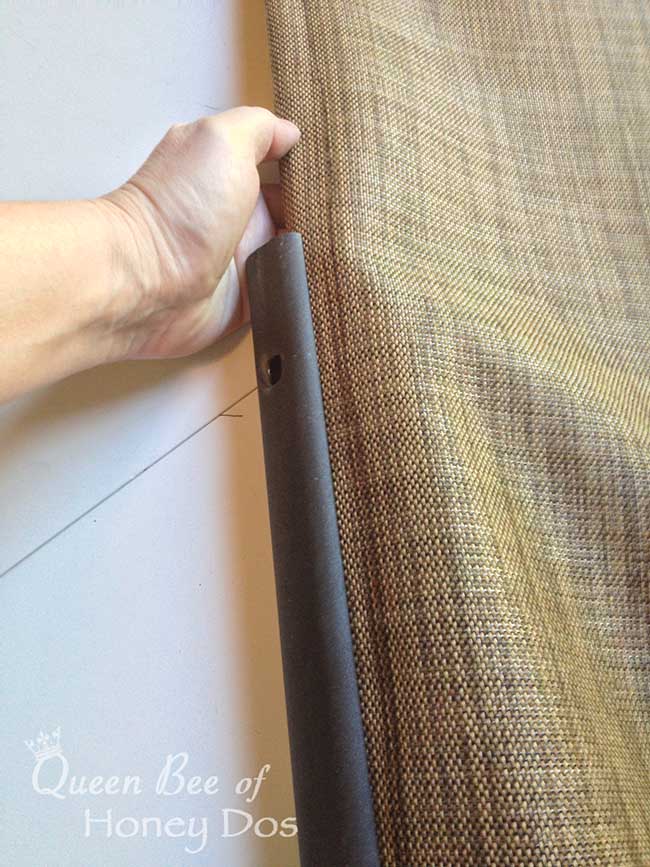
Then, we are ready to reassemble the sections. First, slide the lower seat section back into the tracks of the stretcher bars that were previously removed.
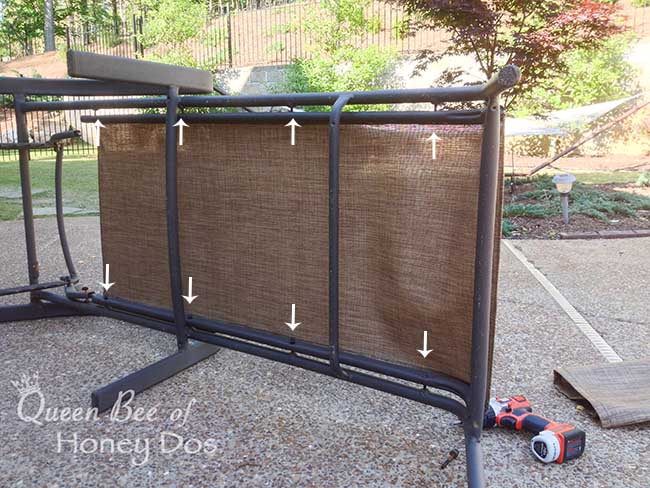
Reattaching the lower stretcher bars back onto the frame.
Make sure that you just loosely attach these bolts at first. You don’t want to tighten them down just yet.
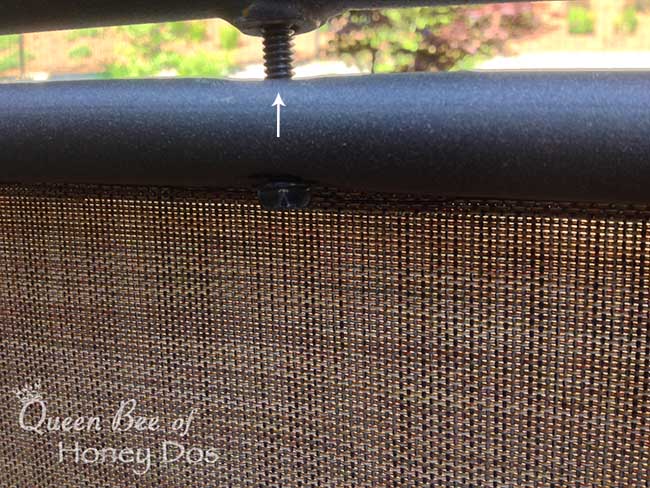
After all of the bolts are loosely in place on the stretcher bars, you can begin to tighten them down.
Tighten each bolt evenly, giving a small amount of tightening to each bolt before continuing to the next. Repeat this process until the bolts are all snug.
This will stretch the fabric evenly. If you measured correctly on your pattern, it should be nice and tight.
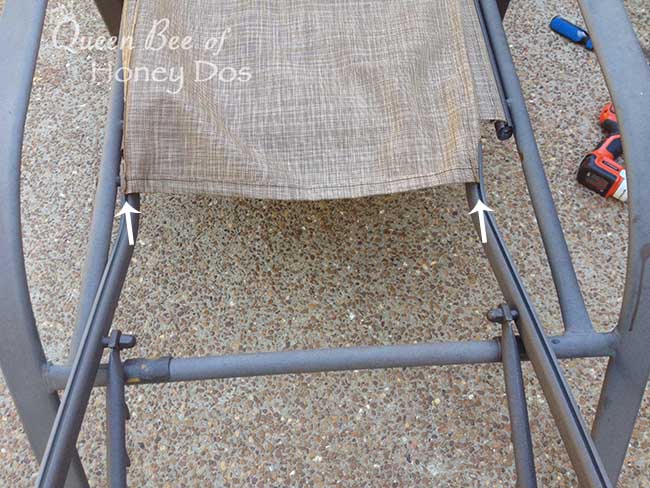
Now, it is time to do the head section. Begin by sliding the tubing-covered fabric into the tracks from the lowest point of the head section. You want to begin as far away from the stretcher bar as possible.
Pull the fabric up and through the track. You will probably need to shift from side to side, pulling a small bit on each side until you work it back in place.
It may take some strong tugging to get the fabric to cooperate, but as long as the measurements are accurate, you should be able to maneuver it in small increments.
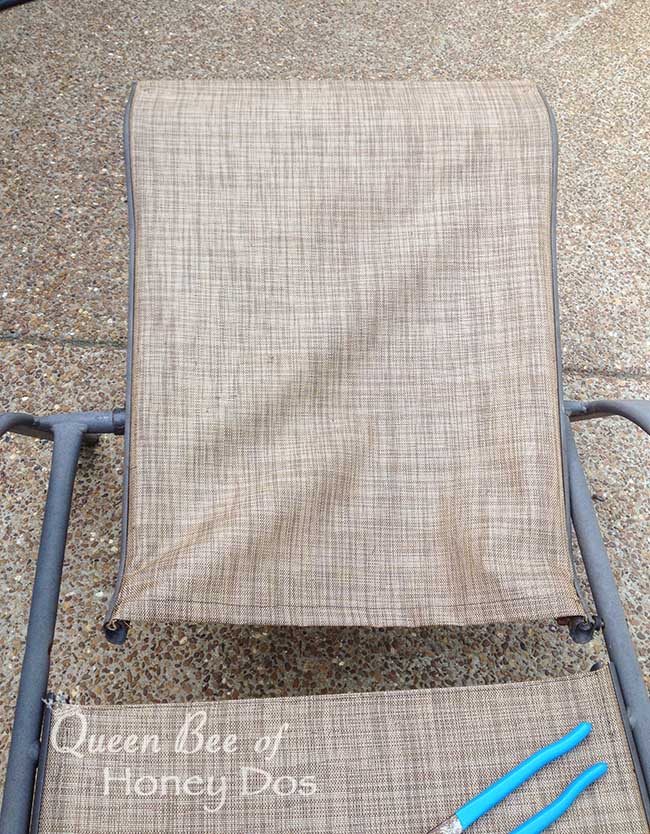
Notice how the fabric is very loose at the bottom but tight at the top where the stretcher/support bar is located.
The bottom is loose because my chaise had bolts on either side. I had previously detached the right side bolt to give more slack in the fabric.
Once I tightened the bolts, it all pulled in tight.
TIP – If you have a hard time getting the fabric to go all the way back to the top of the head section, you can use the clamp to push it in just a bit just as you did to remove the fabric.
Now for the Big Reveal….

Dah, dah, dah Dah!

I hope that you all enjoyed my chaise lounge repair. Hopefully, it has helped you to do a repair of your own.

Brin says
I’m having my chairs repainted. Question, can I have them paint the the fabric since it’s in good shape?
Rachel Lynn says
I know there are several products out there that claim to be for fabrics. But personally, I wouldn’t use paint on anything that has that much flex. Even the best paints will eventually crack and flake. If the fabric is in good shape, I wouldn’t recommend doing anything that will degrade them. You will likely not be happy come this time next year. Painting the frame should give you a nice refresh though.
Gary Hotte says
Hi I’m having problems sticking the fabric my first chair I broke 2 needles now on my second chair I broke 7 needles and I’m only halfway through the sewing I can’t seem to understand why I am using leather needles and exterior string do you have any suggestions for me thank you
Rachel Lynn says
I would check the bobbin tension and the top tension. Adjust as needed. And make sure that you are getting a nice smooth feed. Beyond that, it is hard to make a diagnoses without seeing a visual. Wish I could be of more help. :-/
Lucile says
my question is about the sewing machine I gae recovered furniture and have issues with the machine breaking thread when I contacted the sewing machine company they said their machines were not made for heavy fabrics use for home deco projects. what kind of sewing machine do you use
Rachel Lynn says
I have a Janome HD3000 and a vintage Singer 15-91. I also have an old cheap $99 machine. I used the cheap one for this project. Going through sling fabric is not that difficult if you use the correct needle and take it slow. But, if you are looking for something that will handle home decor on a regular basis (upholstery fabrics, drapes, etc.) I highly recommend finding a Singer 15-91. You can find refurbished ones on eBay, Etsy, and sometimes on Facebook marketplace. Nothing made for home sewing even comes close to the older vintage machines. If you are good with DIY, you also might consider refurbishing one yourself. In which case, you can find them on Craigslist and sometimes at yard sales.
Mario Mendoza says
Thank you,
I have to lounge chairs that are torn and would like to repair them using your method. Please provide the name of the material and website’s.
Regards,
Mario
Cathy says
I just replaced my sling chair fabric(envelope style) on my Homecrest chairs. Used Phiphertex fabric. Sewed two rows of straight stitches and then binding, single row. The stitching did not keep the fabric from unraveling already. What type of stitching or seam should I have done to hold them? Should I have fused the fabric(front to back) with an iron after stitching?
Rachel Lynn says
Cathy, the sling fabric version from their line is the “Phifertex Plus”. Assuming that is what you meant, the fabric should not unravel to the point of being an issue. Maybe a little fraying on the edges, but it shouldn’t progress beyond the nearest stitch. If it does seem to be more than an acceptable amount, I would try running a zigzag along the edge. As far as fusing, I can’t think of anything strong enough to hold and you don’t want to apply so much heat as to melt the fabric as it may disrupt the integrity. I also would suggest that you reach out to Phifer.com to see if they have a solution specific to their product.
Penny says
My sister, and I did this with her lounge chairs, but it is time consuming and we needed stronger muscles to pull the top material out. the top was the hardest part. If the top had been as easy as the bottom, it would have been an easy project. I don’t think this is something we will be trying again any time soon.
Jill says
Could you put the tubing in along the fold line before you sew the flap down? Kind of like making piping? You might need to use an off-set presser foot (zipper foot)?
Rachel Lynn says
yes.